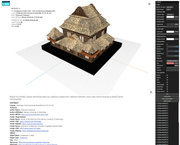
A modern 3D viewer for web and Drupal integration built on three.js. This repo contains the viewer source code, build tooling, server-side helpers, and Drupal integration support. The module was primarily created for viewing 3D data as a Drupal extension for a WissKI based repository. During development it became also possible to use as a standalone version to be integrated with more environments. The Viewer is written in JavaScript, based on the three.js library for viewing 3D models and uses PHP/bash scripts for server-side operations.
viewer/— viewer runtime source, loaders, utilities, metadata handling, and UIindex.html/embed.html— local demo and embed pagesrollup.config.js— build configuration for production and Drupal outputpackage.json— npm scripts and dependenciesviewer/viewer-settings-example.json— runtime viewer settings templatescripts/andphp/— helpers for model conversion, Blender rendering, and Drupal workflowdist/— generated build output (not committed in source)
- OBJ, DAE, FBX, PLY, IFC, STL, XYZ, JSON, 3DS, PCD, GLB, glTF
There is also a pre-configured complete workflow to handle more file formats and allow to render thumbnails for entries. If an uploaded file is saved in one of the compression-supported formats, it is compressed on-the-fly and converted into GLB format and triggers automatic rendering (based on Blender utility).
- uploaded files (3D models, textures, other sources) should be named like:
- hyphens or underscores instead of spaces
- no national characters such as symbols or spaces
- uploaded archive should be named the same as input file and content should be placed directly in the archive (without subdirectories)
- upload all the sources needed for rendering. For example OBJ needs MTL files (if any) and textures uploaded too. If you want to do this, please place them inside a single archive.
Client: JavaScript, three.js, CSS, HTML, PHP, Drupal
Server: PHP, Drupal, bash, blender
- Install Node dependencies:
npm install- Create the runtime settings file:
cp viewer/viewer-settings-example.json viewer/viewer-settings.json- Start the dev server:
npm run dev:testor using http-server:
http-server -c-1or using PHP:
php -S 127.0.0.1:8000 -t ../../viewer- Open the demo at:
http://localhost:1234
viewer/viewer-settings.jsonis required at runtime when running from source. Use the example file as the starting point.
The repository includes a minimal admin panel at viewer/admin/ for editing viewer-settings.json, scripts/.env, managing HDRI and running maintenance tasks.
-
Ensure PHP CLI is installed and the webserver user can write into
viewer/admin/. -
Install SQLite support (PHP extension and CLI)
For Debian/Ubuntu:
sudo apt update
sudo apt install php-sqlite3 sqlite3
For RHEL/CentOS/Fedora:
sudo dnf install php-sqlite3 sqliteAfter installing the PHP extension, restart your webserver/PHP-FPM:
sudo systemctl restart apache2        # or nginx + php-fpm
sudo systemctl restart php8.4-fpm     # adjust version as needed
Verify installation:
php -m | grep -i sqlite
sqlite3 --version-
Create the SQLite admin DB and the first admin user (CLI):
-
Create the SQLite admin DB and the first admin user (CLI):
# from repository root
php viewer/admin/create_admin.php <username> <password>

# or from viewer/admin/
php create_admin.php <username> <password>
The script will create viewer/admin/admin.sqlite automatically and insert the user (passwords are hashed).
- Open the admin UI in your browser and log in:
http://<host>/viewer/admin/login.php
- Notes & troubleshooting
- The
create_admin.phpscript must be run from a shell (CLI). If it fails, verifyphp -vand file permissions. - The web server (e.g.
www-data) must have write access toviewer/admin/admin.sqliteand to theviewer/andscripts/paths for saving settings and backups. Example:
sudo chown -R www-data:www-data viewer/admin viewer scripts
sudo chmod -R 750 viewer/admin viewer scripts- If you need to reset or change the admin password you can either recreate the user with the CLI (delete the old row using
sqlite3) or edit the DB manually. Example to open DB with sqlite3:
sqlite3 viewer/admin/admin.sqlite
-- then: SELECT * FROM admins;  DELETE FROM admins WHERE username='...';
Security: this admin panel is intentionally minimal. For production use enable HTTPS, restrict access by IP if possible, and consider adding CSRF protection and stronger session handling.
To create a static dist bundle and preview it locally:
npm run build:test
npm run serve:dist
This writes build output into dist/test/ and serves it with a small HTTP server.
npm run dev:test— start Parcel dev server withBUILD_SOURCE=IIIF,BUILD=testnpm run dev:dev— start Parcel dev server withBUILD_SOURCE='',BUILD=testnpm run dev:prod— start Parcel dev server withBUILD=prodnpm run build:test— Rollup build fordist/testnpm run build:dev— Rollup build fordist/devnpm run build:prod— Rollup build fordist/prodnpm run build:drupal— Drupal-specific build usingscripts/build-drupal.jsnpm run build:drupal:custom— custom Drupal build with module prefixnpm run watch— Rollup watch mode for live rebuildsnpm run serve:dist— serve the currentdistfolder withservenpm run pack-dist— packagedist/intodfg_3dviewer-dist.zipnpm run dev:tauri— build dev bundle and serve for Tauri developmentnpm run tauri:dev— run Tauri in dev modenpm run tauri:build— build the Tauri desktop app
viewer/main.js— current viewer runtime entry point in source modeindex.html— demo page used by local builds anddistpreviewembed.html— viewer embed page with URL controls
In built output, the generated bundle is exposed through the module entry dfg_3dviewer-module.js.
A separate reference file documents the main exported runtime functions and helpers used by the viewer.
viewer/FUNCTIONS.md— function descriptions forViewer, loader helpers, metadata handlers, utilities, and build/runtime helpers.
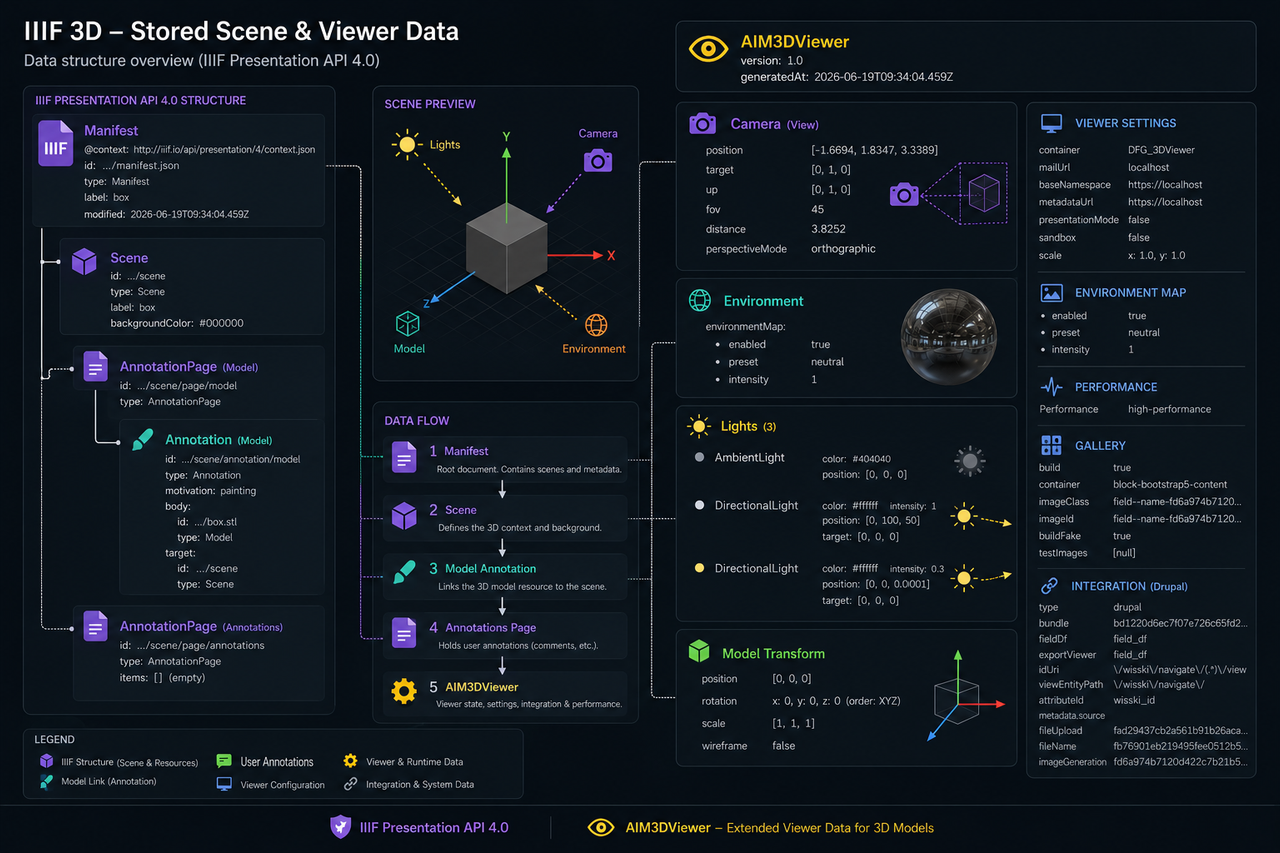
The viewer loads configuration from viewer-settings.json at runtime.
The example template is located at viewer/viewer-settings-example.json.
mainUrl— base backend URL used by viewer metadata and resource requestsmetadataUrl— metadata service URLbaseNamespace— namespace used for entity routing and metadatabaseModulePath— path to viewer assets/module when deployed
entity.bundle— Drupal/WissKI entity bundle identifierentity.fieldDf— field name used for 3D file referencesentity.exportViewer— export field name for viewer settingsentity.exportViewerUrl— metadata URL used by export/viewer integrationentity.idUri— pattern to extract entity IDs from pathentity.viewEntityPath— base path for entity viewsentity.attributeId— identifier used for viewer container attributeentity.metadata.source— metadata source label, e.g.DrupalorIIIF
viewer.container— target container ID for WebGL viewerviewer.fileUpload— Drupal upload field IDviewer.fileName— Drupal file name field IDviewer.imageGeneration— Drupal field ID for image generationviewer.lightweight— enable lightweight viewer mode whentrueviewer.editor— show editor controlsviewer.gallery.build— enable gallery generation from metadata/gallery sourcesviewer.gallery.container— DOM container for generated gallery thumbnailsviewer.gallery.imageClass— class used to locate gallery imagesviewer.gallery.imageId— optional gallery image ID selectorviewer.background— CSS background string for viewer canvasviewer.performanceMode— performance mode config objectviewer.measurement.modelUnitInMeters— conversion ratio from model units to metersviewer.scaleContainer— scale adjustments for the viewer container
rollup.config.jscopiesviewer-settings.jsonintodist/<target>/- For
testanddevbuilds, the generatedviewer-settings.jsonis modified to:- set
mainUrl = 'localhost' - disable gallery build
- enable editor mode
- set
viewer.lightweight = true
- set
- For
drupalbuilds,baseModulePathis rewritten to the Drupal assets path andentity.metadata.sourceis set toDrupal
Example embed markup:
<div id="DFG_3DViewer" 3d="./examples/box.stl" style="height: 50vh"></div>
<script type="module" src="dfg_3dviewer-module.js"></script>
This is the current built runtime entry pattern. The viewer reads the 3d attribute from the container and loads the model.
embed.html supports these query parameters:
model/srcidthemeautorotateautorotateSpeeddisableInteractionhideUihideMetadatacamPoscamTargetfov
Example:
/embed.html?model=/examples/box.glb&theme=light&autorotate=1&autorotateSpeed=1.2&camPos=1.2,0.8,2.5&camTarget=0,0,0&fov=45
- 3D file formats: OBJ, DAE, FBX, PLY, IFC, STL, XYZ, JSON, 3DS, glTF;
- compression and rendering on-the-fly: OBJ, FBX, STL, DAE, PLY, ABC, BLEND, STL, WRL, X3D, GLB, GLTF;
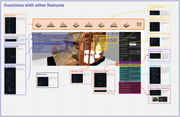
- 3D viewer with orbit controls, zoom, and basic editor tools;
- changing lights properties and environment maps;
- standalone version | embeddable version | presentation mode | lightweight or full mode;
- loading archives (zip, rar);
- IIIF comliant metadata handling;
- metadata fetching and display integration
- saving/loading custom object's position, scale, rotation, lights, camera
- gallery generation and embedded preview UI
- face picking, ruler measurement, clipping planes, and material editing
- view object's hierarchy and select groups by name
- fullscreen support and screenshot/thumbnail generation
- Drupal/WissKI integration hooks
- adding watermark
Main workflow is divided into two automatic parts:
- pre-processing - uploaded model is uncompressed (if so) and converted into glTF (glb) format
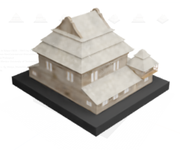
- automatic rendering - Blender side rendering of 3D model’s thumbnails
The conversion pipeline lives in scripts/ and php/.
After uploading 3D model into repository there are triggered following steps:
- uncompressing 3D models - it is done on Drupal side module script inside
dfg_3dviewer_entity_presaveand supports following archive formats: zip, rar, tar, xz, gz. According to the format, the bash script is triggered with following arguments:/scripts/uncompress.sh archiveType -i inputPath -o extractPath -n fileName - automatic conversion into glTF (glb) format for the following supported formats:
- abc, dae, fbx, obj, ply, stl, wrl, x3d - function
handle_file - ifc - function
handle_ifc_file - blend (in progress) - function
handle_blend_file - glb - triggers next step - function
render_preview
- abc, dae, fbx, obj, ply, stl, wrl, x3d - function
This step is performed inside scripts/convert.sh bash script, which is the primary helper for converting files to glTF/GLB and rendering preview images with Blender.
Defaults .env variables should be adjusted due to your needs:
BLENDER_BIN=''
# Optional override. If empty, scripts auto-detect the module root from this file location.
SPATH=
BACKUP_SETTINGS_PATH=/var/www/data/project/web/sites/default/settings.php
RENDER_RESOLUTION='1024x1024x16'
RENDER_SAMPLES='20'
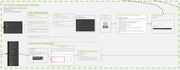
The script uses Blender to convert the file into glTF format and then renders a preview image with it using blender's built-in cycles engine. The result is saved in a set of pictures with different view angles. This step needs some steps to be performed before rendering:
- create scene containing loaded 3D model
- calculate bounding box (for camera and lights settlement)
- scale scene according to bounding box
- setup basic properties for rendering engine, output quality, lights, camera
- prepare rendering from camera placed in 9 different positions (left, left top, front, front top, right, right top, back, back top, top)
- write rendering outputs into png files with consecutive naming
- abc, dae, fbx, obj, ply, stl, wrl, x3d, ifc, blend, gml, xyz, pcd, json, 3ds, glb, gltf
Convert an OBJ to GLB and render previews:
./scripts/convert.sh -c true -l 3 -i '/path/to/input.obj' -b trueConvert an IFC with IfcConvert:
./scripts/convert.sh -i '/path/to/building.ifc'Run lightweight conversion without xvfb checks:
./scripts/convert.sh -t true -c false -i '/path/to/input.obj'-c— compression true/false-l— compression level 0-6-i— input file path-o— output folder (optional)-b— binary output true/false (GLB vs glTF)-t— lightweight true/false-f— force overwrite
BLENDER_PATH— path to the Blender binarySPATH— repository or module base path used by scriptsCOMPRESSION— whether glTF compression is enabledCOMPRESSION_LEVEL— compression levelGLTF— targetgltforglbFORCE— overwrite existing outputsIS_ARCHIVE— if input is an archiveLIGHTWEIGHT— skip heavyweight checks and rendering steps
npm run pack-distpackages the distribution intodfg_3dviewer-dist.zip- the repo also contains a GitHub Actions workflow for building release artifacts on tags

This repo also includes a Tauri desktop wrapper in src-tauri/.
npm run tauri:dev— run the app in Tauri dev modenpm run tauri:build— build the standalone desktop executable
- Always serve the viewer over HTTP(S).
file://mode usually fails because of module import and fetch restrictions. - For local preview use
npm run serve:distornpm run dev:test. - If you use
pack-dist, make surezipis installed on your system. - Drupal builds use
npm run build:drupalornpm run build:drupal:custom.
viewer/viewer-settings-example.json— runtime configuration templateviewer/viewer-settings.js— runtime settings loader used by built/source bundlesrollup.config.js— build output and asset copy configurationscripts/convert.sh— conversion and Blender rendering helperdfg_3dviewer.libraries.tpl.yml— Drupal libraries template used in Drupal build