
This is my final project of TSTI2D.
Project available at : https://github.com/lionrayonnant/Mr.Robot-Robot-Livreur/
Because it was the project who was attribuated to me. There is the problematic :
The market for the sale and distribution of grocery-type products is constantly evolution ; exclusively in stores of proximity or by traders until 1955 to 1960, then in department stores (supermarkets then hypermarkets) on the outskirts urban.
And then, the question :
How to deliver everyday groceries in urban areas while minimizing environmental impacts while reducing the effort and time spent by customers ?
This project has two interest :
- improve user comfort
- contribute to minimizing environmental impacts by reducing the use of thermal cars personal
And finnaly a finality :
Préparer technologiquement l’évolution sociétale de la distribution des produits courants de type épicerie.
In this project, we were 5 guys with 1 task each.
List of the tasks :
- [1] Study, simulate and carry out the control of the motorization and the detection of possible obstacles.
- [2] Study, simulate and carry out motorization control and displacement counting actually done.
- [3] Study, simulate and carry out the local display to the robot (at a minimum) of the status of the missions and the energy charge rate.
- [4] Study, simulate and carry out remote monitoring of the evolution of the robot and the display of main parameters on a supervision PC.
- [5] Studying, simulating and carrying out the authorization of access to products based on the reading of a QR Code.
My task was the number 1. So, I have made a lot of research and take some notes before starting. I have search how to complete my task by the best way without spend too much money.
So I choose these components for the realization of the robot :
- Raspberry Pi 4 B board - 2 GB
- 32 GB SD card
- US detection module HC-SR04A
- Official 8 MP RB-CAM-V camera
- External USB battery UPBK10002BK 10000 mAh - 1 x 2.1 A, 1 x 1 A and 1 x 3 A
- Buzzer SV3 8 à 15 Vcc - 88 dB
- Cable 10 cm USBC-0.1
- Box + switch 9V BH9VB
- Chassis Robot05
- Motor kit + FIT0450 encoder
- Hat module 2 DC motors 1.2 A DFR0592
- Base Hat for Raspberry Pi Grove
You can also count som male-male cable and some female-male cables and also a bredboard coupled with 2 led ( 1 green and 1 red )
Here is the list of the component with links for shop them : Liste composants robot livreur.xlsx
You can find below some realizations graphic that I have made.


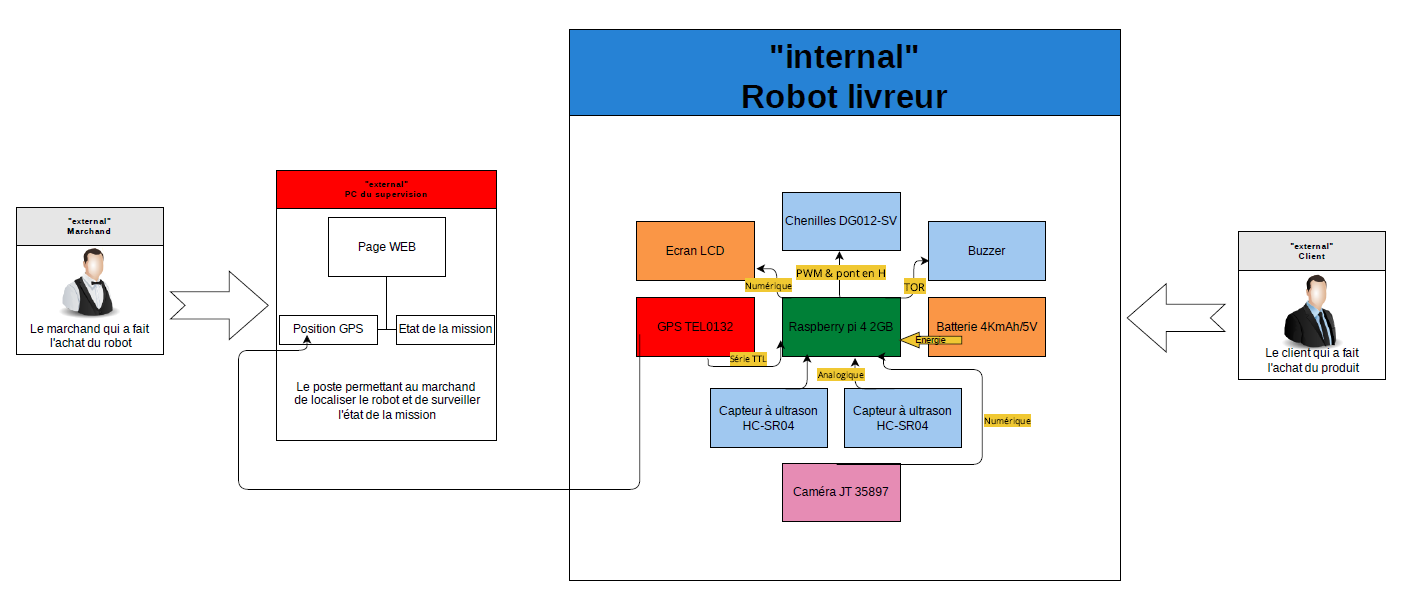
Here is the global diagram : global_diagram.pdf
You can find all the necessary informations in this documentation : pj2-robot05-manual-2152.pdf
Now you should have something like this :


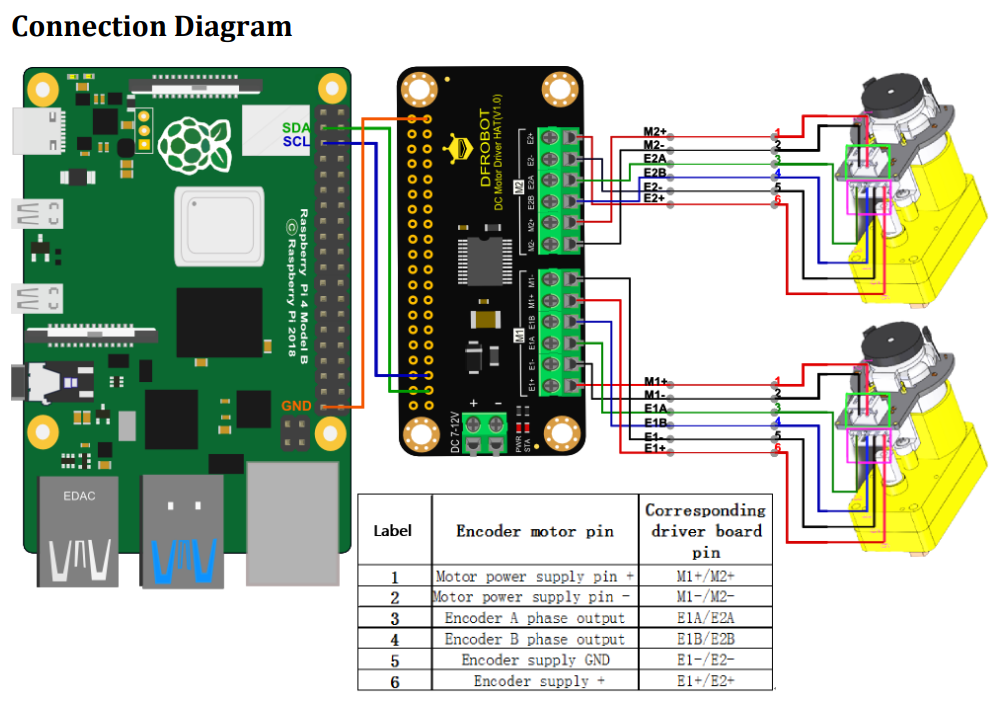
Logically, you put the necessary cables from the motors and the incremental encoders to the RPI4.
You can use the documentation of the motors if you need of : https://wiki.dfrobot.com/Micro_DC_Motor_with_Encoder-SJ01_SKU__FIT0450
{2} To let the RPI4 have a full controll on the motors, you will need to place the Hat module 2 DC motors 1.2 A DFR0592 on the RPI4.
You just have to place it on the GPIO Pins.
Their is the documentation if you need of : https://media.digikey.com/pdf/Data%20Sheets/DFRobot%20PDFs/DFR0592_Web.pdf
Their is the full documentation of this camera : https://www.raspberrypi.com/documentation/accessories/camera.html
Their is the tutorial to plug the camera on the raspberry pi : https://youtu.be/GImeVqHQzsE
At this point, the robot should look like this :
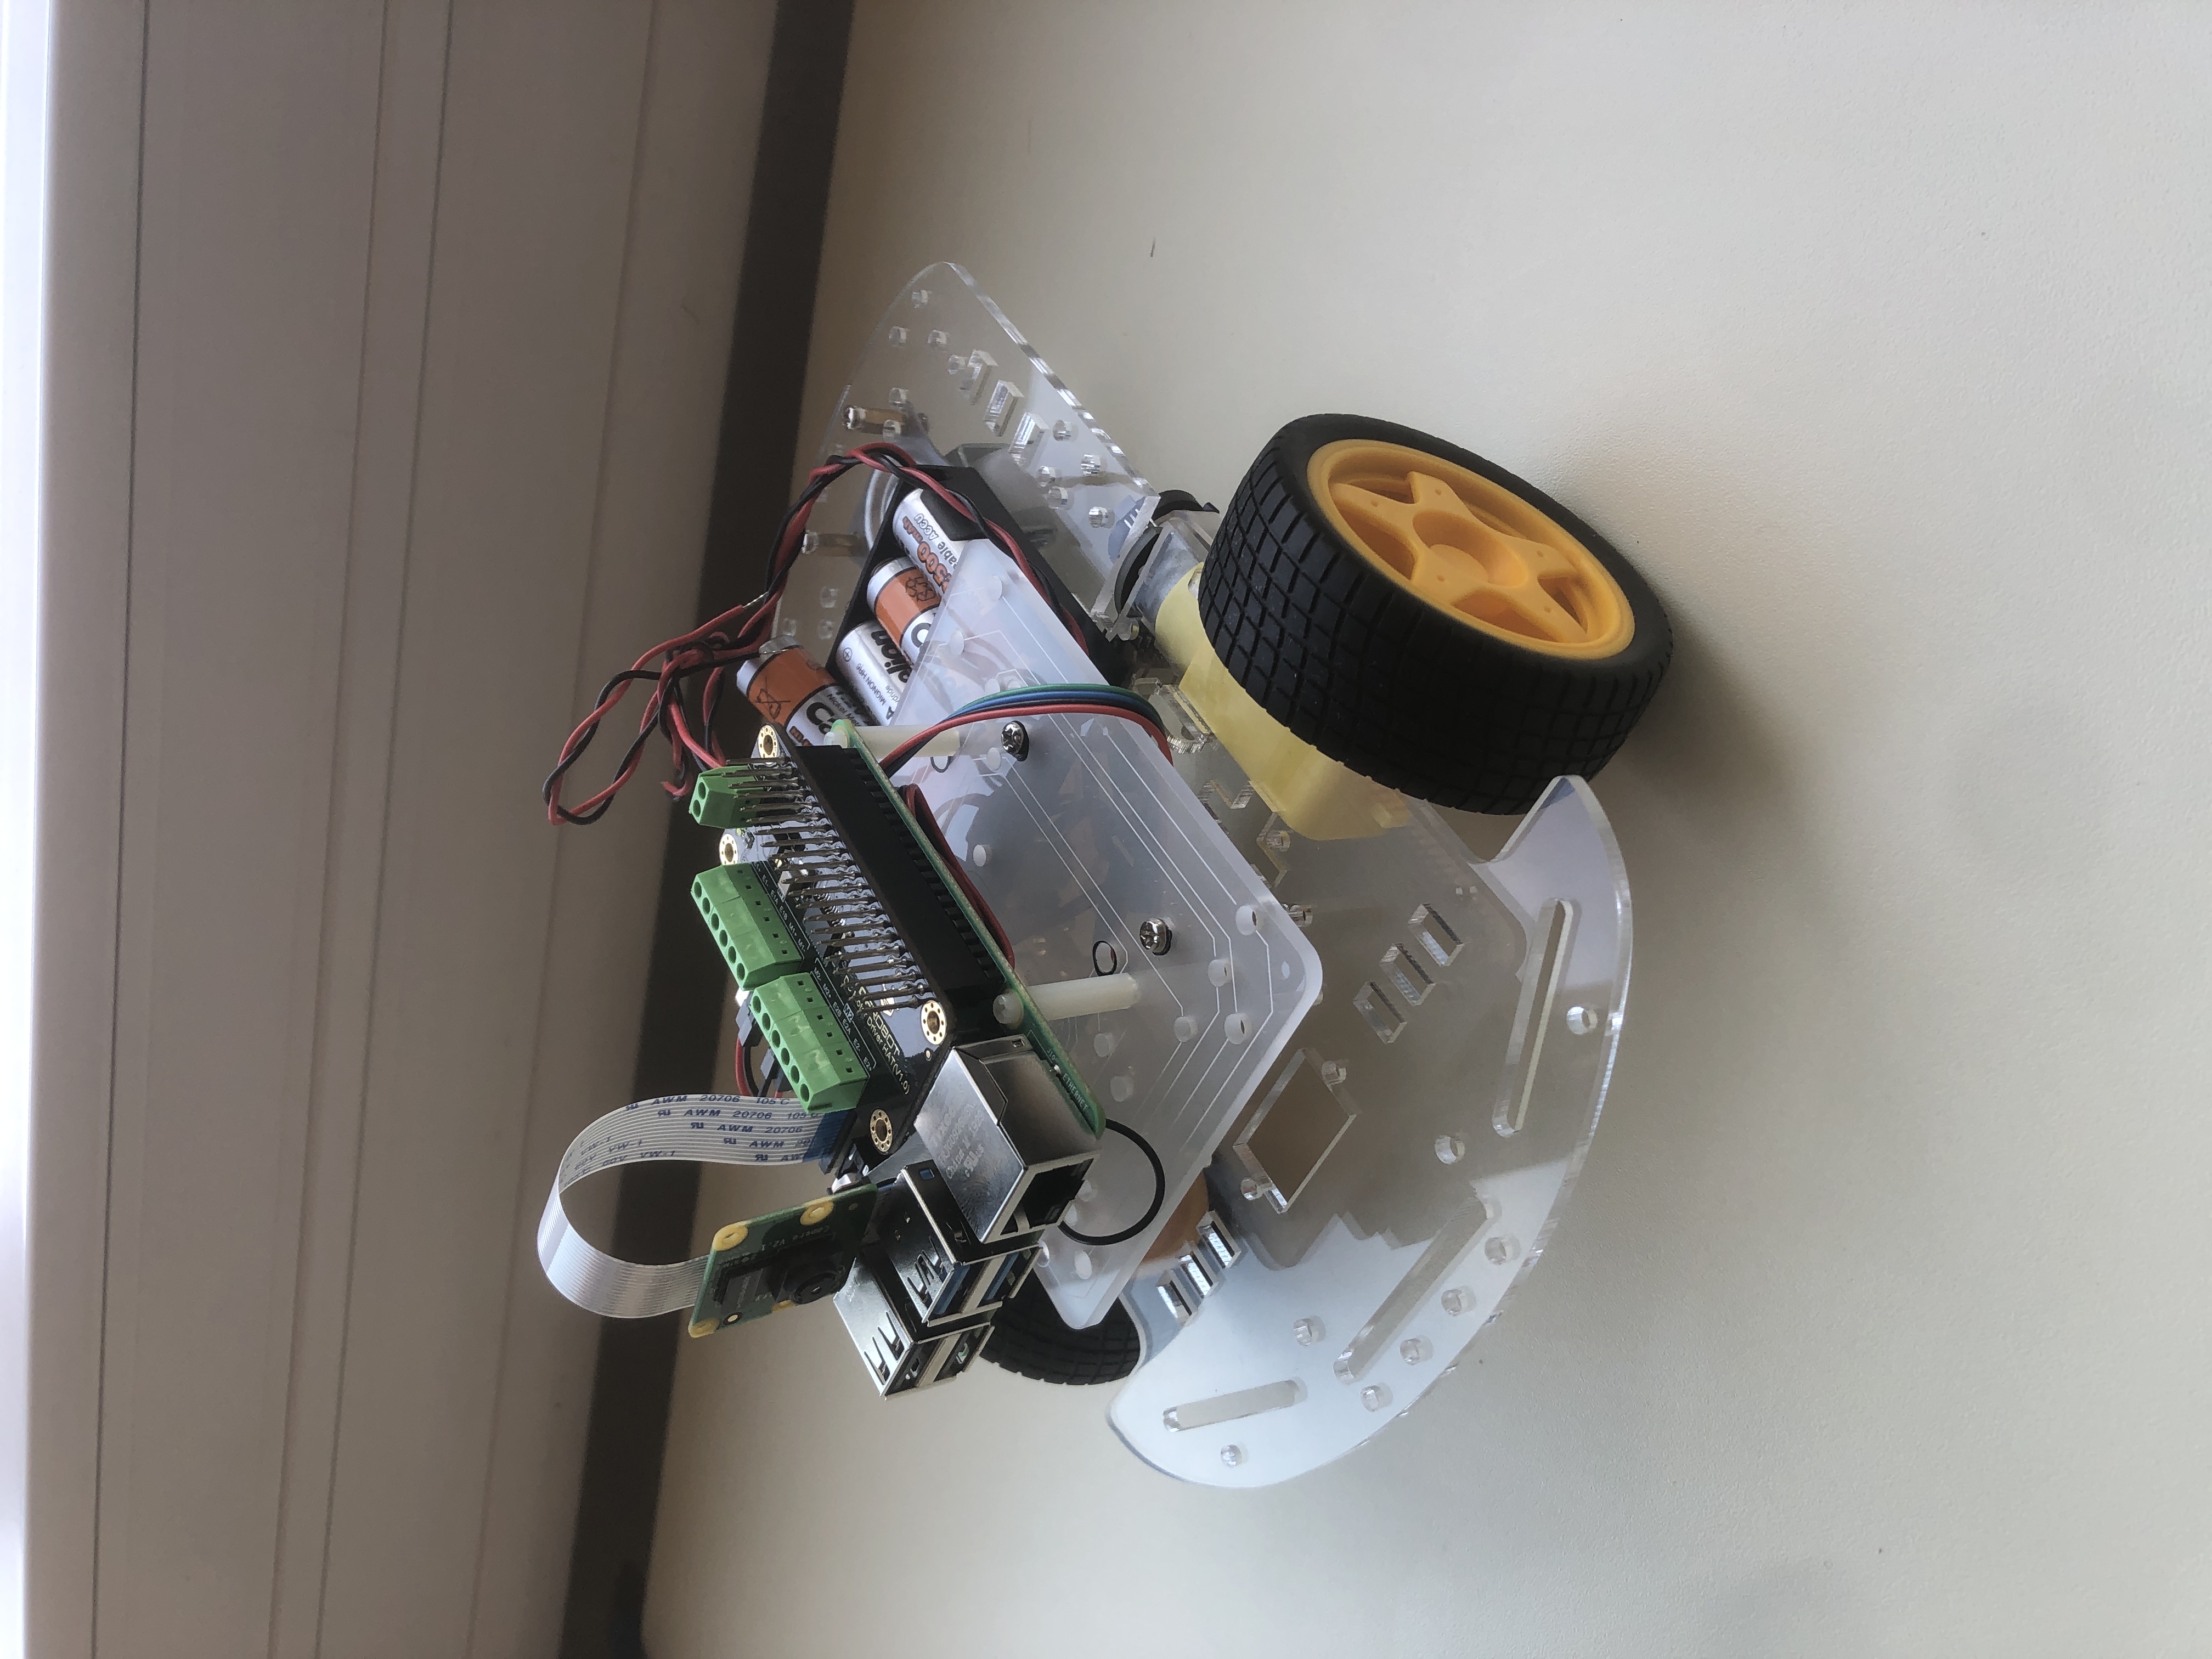
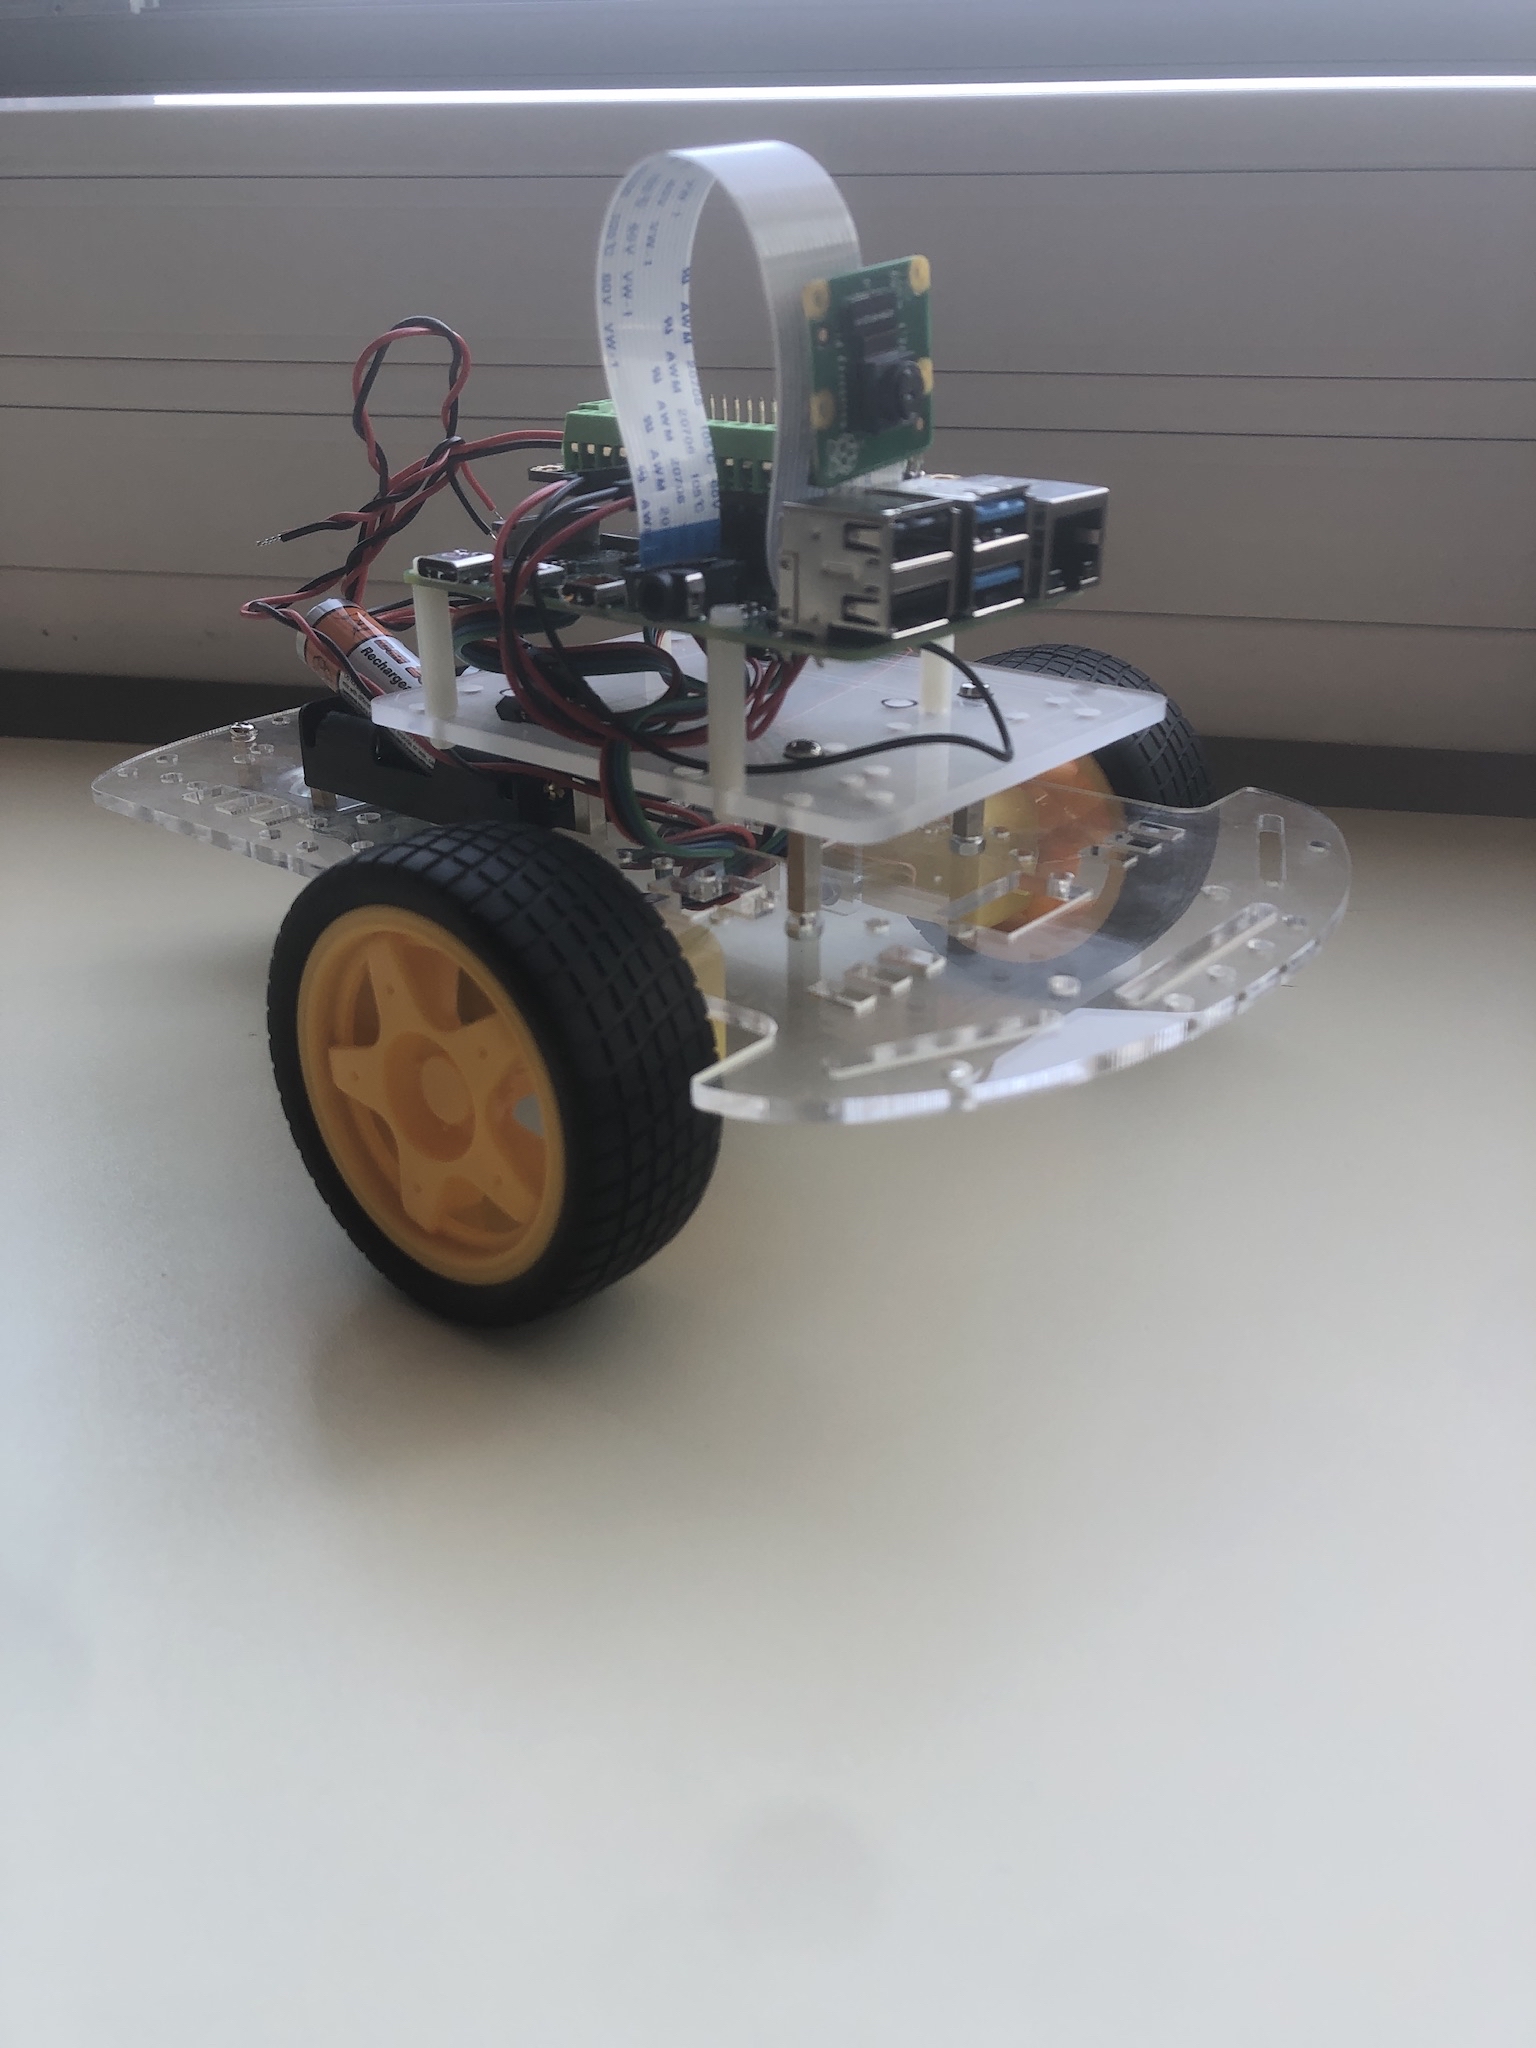
You just have to set it on the GPIO Pins.
Their is the documentation : https://wiki.seeedstudio.com/Grove_Base_Hat_for_Raspberry_Pi/
You have to plug them on the hat set just before. Be sure to plug them on the same ports as indicated in the code. Their is the documentation : https://www.gotronic.fr/pj2-hc-sr04-utilisation-avec-picaxe-1343.pdf
As the pictures below, plug the necessary cables, the leds and the buzzer.
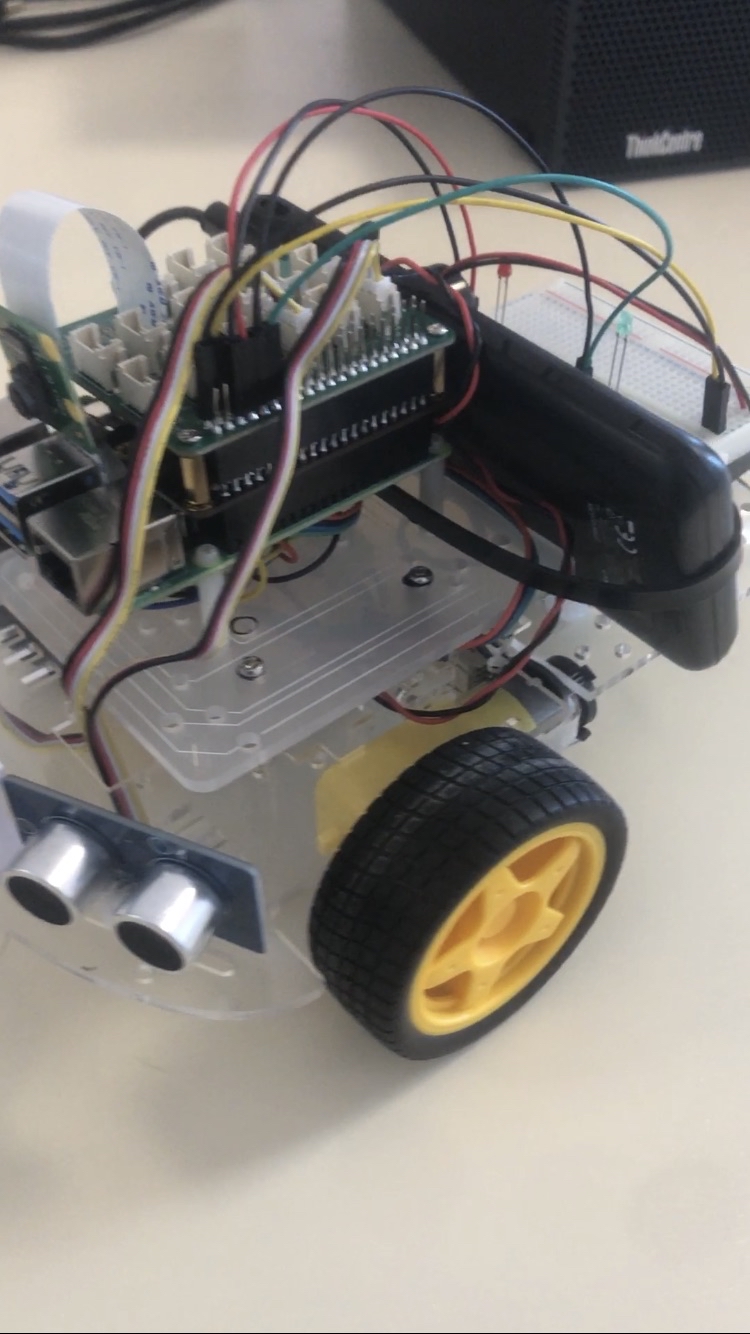
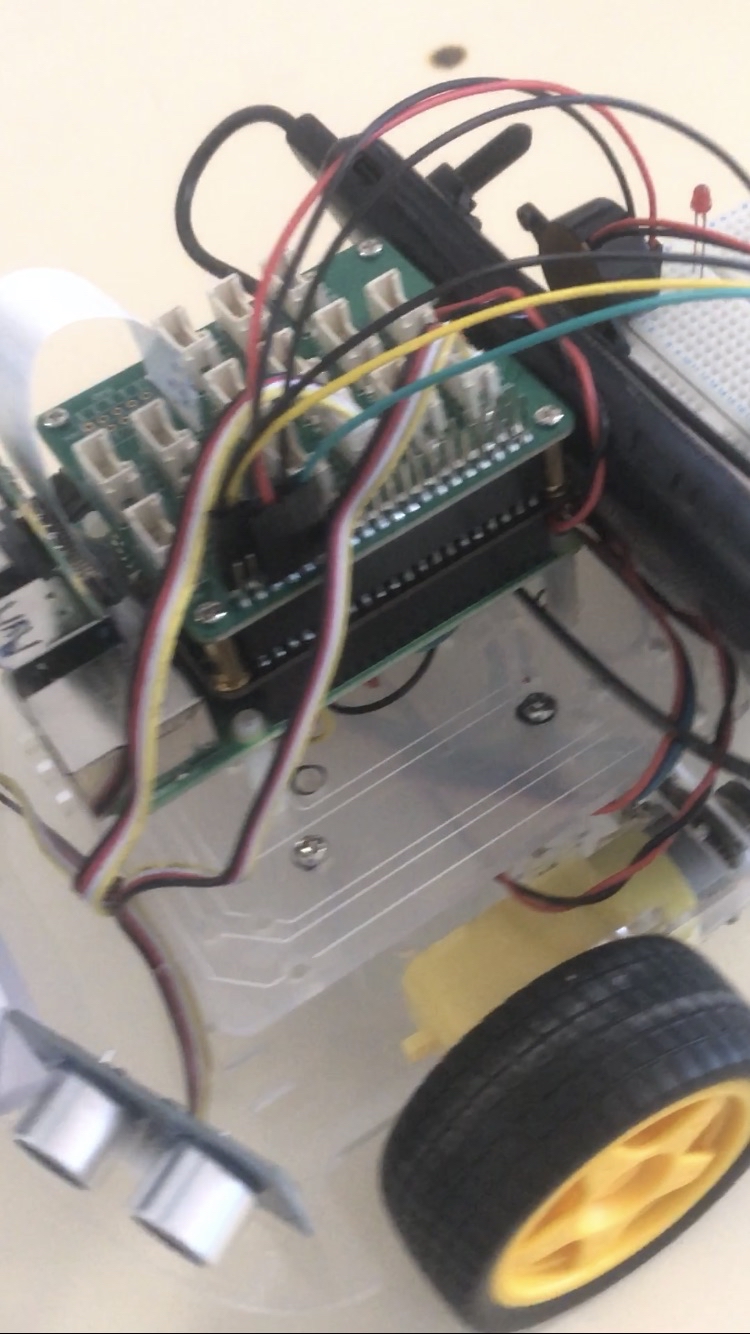
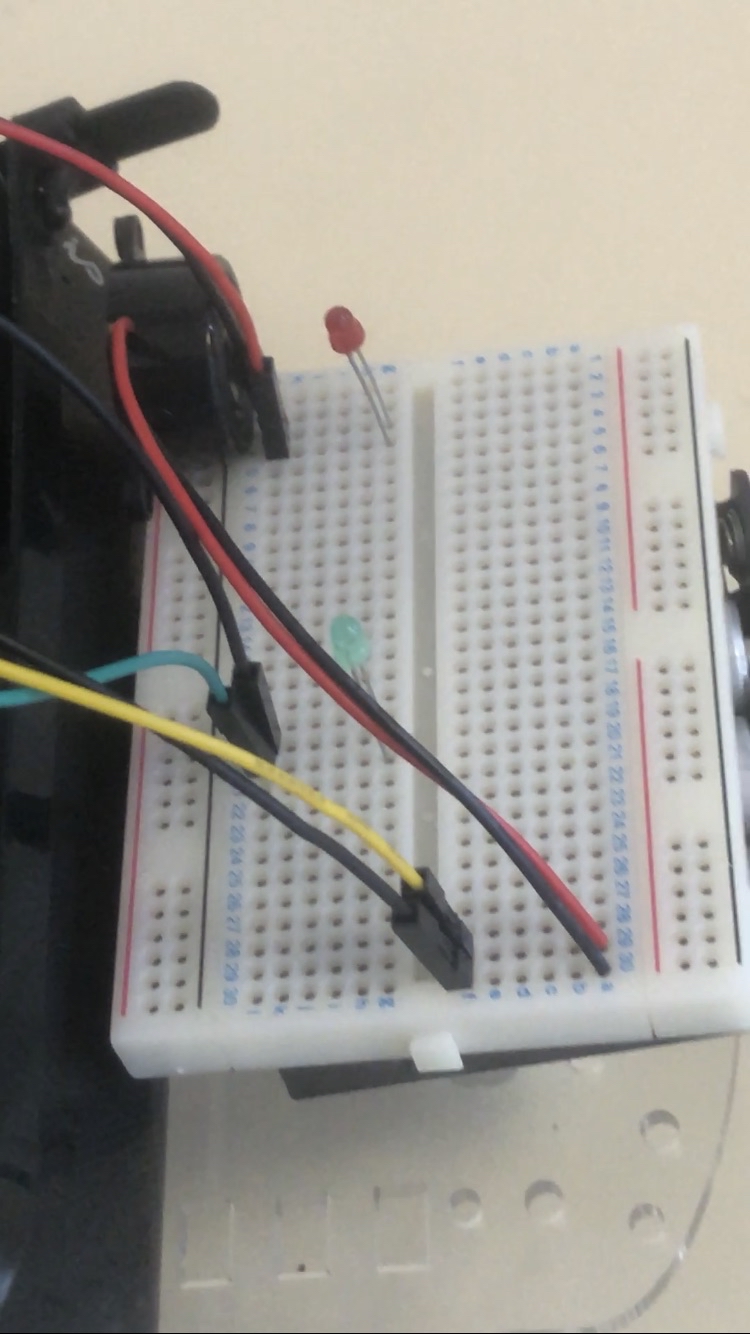
robot_review.mov
{7} Add the External USB battery UPBK10002BK 10000 mAh - 1 x 2.1 A, 1 x 1 A and 1 x 3 A and the accumulator in the case.
I recommend that you place the external battery as shown above with a rilsan without overtightening.
You will see, that very easy. First, you need to grab your 32 GB SD card and plug it in your desktop. Then, launch your favorite web-browser and download the software "Balena Etcher". Their is the link of the official website : https://www.balena.io/etcher/
Once you have install the software, go to https://raspberry-pi.fr/telechargements/ and download the raspbian image. Don't choose the lite version because it will be more difficult to connect at the wifi because it's a version with only the terminal, so their are no graphical part. But if you want you can choose the lite version and connect the raspberry pi at internet with a Ethernet cable during the download of libraries.
Now, launch Balena Etcher, choose your SD card in the devicees detected, choose the raspbian image you just have download and start flashing your SD card. As soon as the flash process is finish, remove the SD card and plug it in the RPI4. If you need more detailled explanations with visuals, check this video : https://www.youtube.com/watch?v=En3C6uccixw
You can boot the RPI4 by link him on a screen, connect the power bank, a keyboard and a mouse. Now you arrived on the desktop menu.
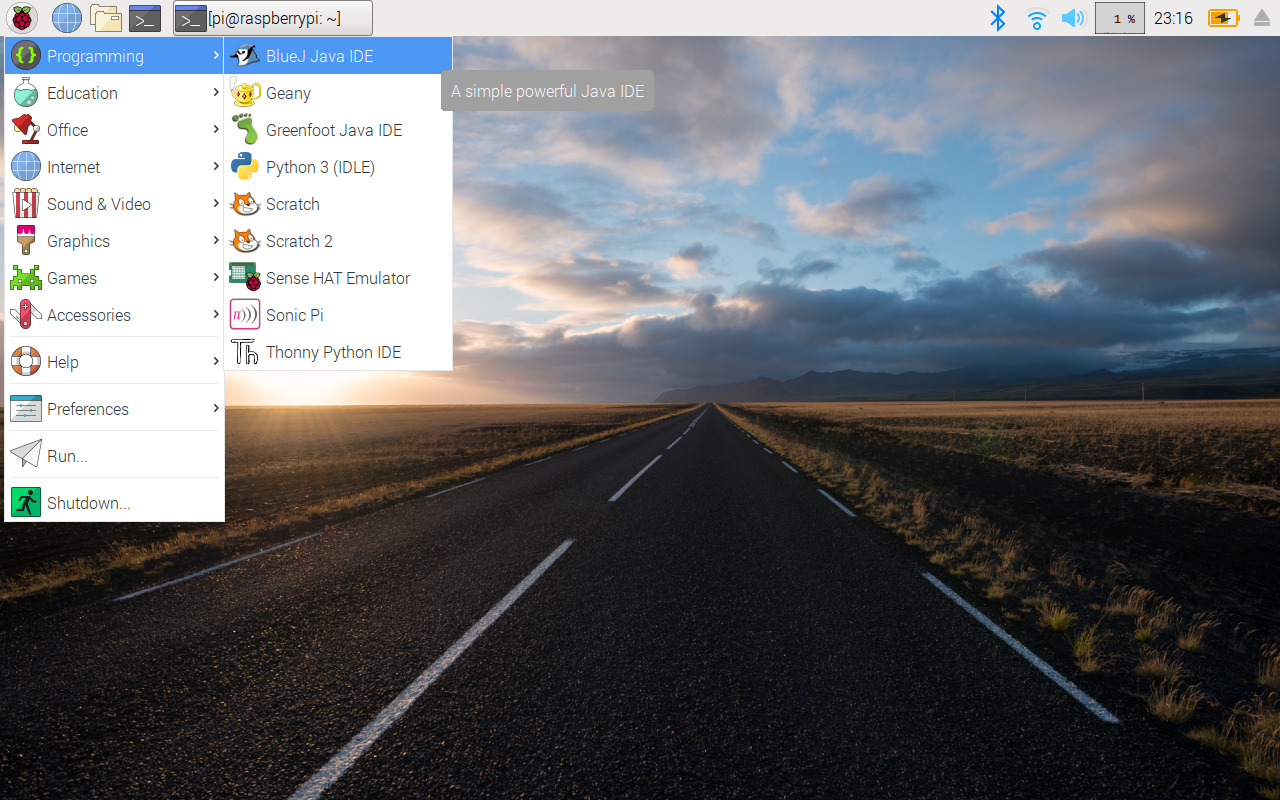
On the upper right you can set up your WIFI. Once your WIFI is configurated, update your RPI4 with these commands runs in the terminal :
sudo apt update
sudo apt upgrade
note : you can contract this recurring commands by adding "&&" between the two commands and adding "-y" to say yes automaticaly.
sudo apt update && sudo apt upgrade -y
Okay right, now we can start the instalation of my software solution !
First, go in the files explorer, in the Documents section and create a new folder with the name indulge yourself, for me it's "BEN". Then, you have to go in this folder by the terminal. For it, we gonna use the ls and cd command. Write ls in the terminal. This command list to you the directories presents in the directory were you are actually. You should see this :
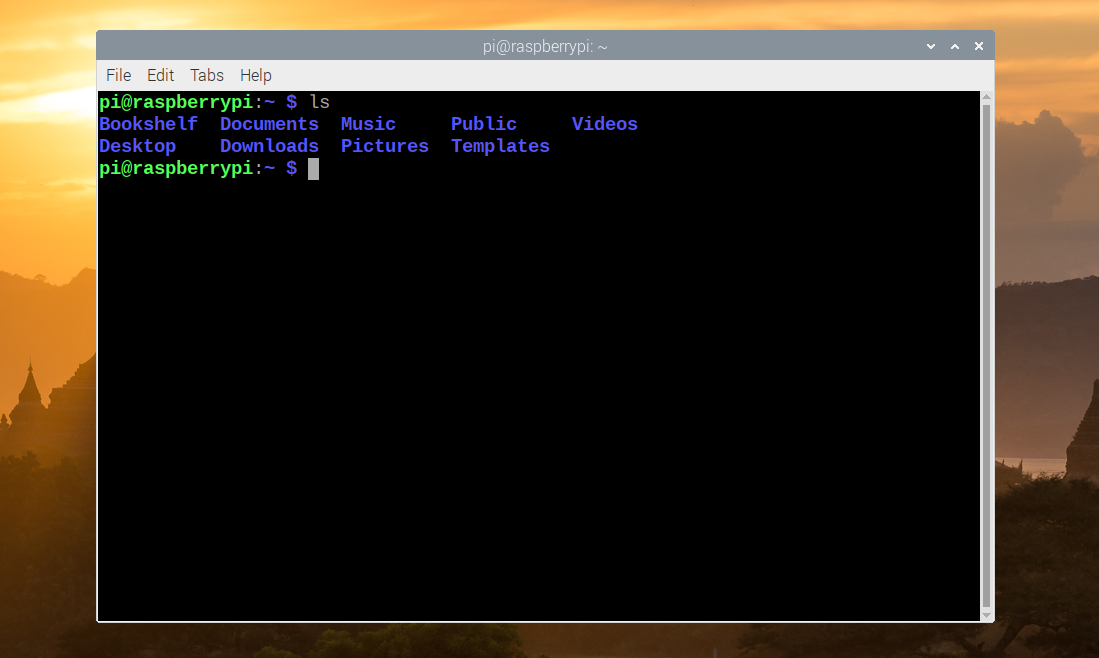
To go in the Documents directory, write cd Documents/ ps : you can write the begin of the directory and makes TAB to complete his name and btw safe some time. Now, you can clone properly the Github with this command :
git clone https://github.com/lionrayonnant/Mr.Robot-Robot-Livreur
Now you gonna need to get some libraries.
If you want that the code executes well, you nedd to add this libraries in the project folder.
To install this library you need to write this command in the terminal :
pip3 install adafruit-circuitpython-lis3dh
Their is the link of the repo Github : https://github.com/adafruit/Adafruit_CircuitPython_Bundle
To install this library you need to write this command in the terminal :
pip3 install adafruit-circuitpython-us100
Their is the link of the repo Github : https://github.com/adafruit/Adafruit_CircuitPython_US100
To install this library you need to write this command in the terminal :
git clone https://github.com/Seeed-Studio/grove.py
Their is the link of the repo Github : https://github.com/Seeed-Studio/grove.py
You need to download opencv2 if you want run the camera.
Enter the commands bellow in the terminal to install it :
sudo pip3 install opencv-contrib-python==4.5.5.62
sudo apt install libhdf5-dev libhdf5-serial-dev libhdf5-103
sudo apt install libatlas-base-dev
pip3 install numpy --upgrade --ignore-installed
pip3 install pyzbar
pip3 install qrcode
Link of the library repo 🇪🇸 : https://github.com/ComputadorasySensores/Capitulo53
For makes run the robot you have two options. The first is to run the code with the code editor by default in the RPI4. So, you just have to click on the file named "[1]deplacements.py" and then, click on the big green button. If you want to makes run the robot from a distance you gonna need of the SSH.
To use ssh you need to have a computer connected at the same network at the RPI4. On the computeur install Putty, their is the link of the website : https://www.putty.org/
Then, get back on the RPI4 and just hover your mouse over the internet icon at the top right. It should show you something like this :
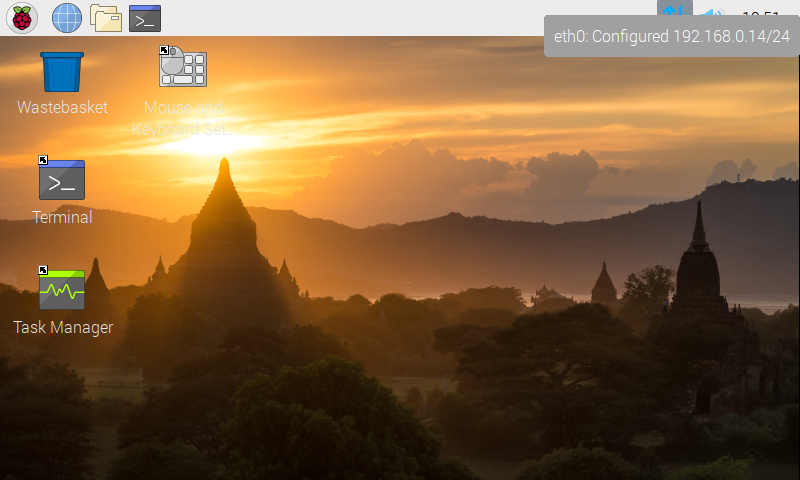
The series of numbers displayed is your local ip address. Pick it up and write it down.
We gonna authorize the SSH connection, disabled by default for security reasons. Now open a terminal on the RPI4 and type this command :
sudo raspi-config
Now you should have this graphical interface :
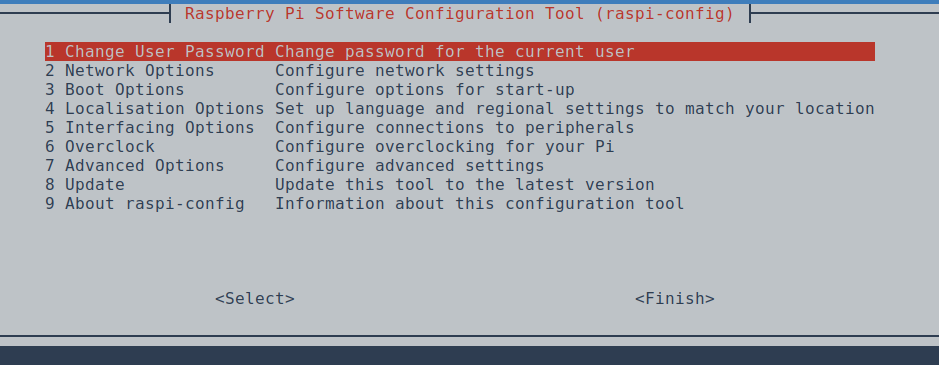 raspiconfig is very usefull for a lot of parameters on raspberry pi.
I advice you to change your password first, it's the first line, just make enter and follow the instructions. Now you can enable ssh securely
Now go on the "Interfacing options" line, make enter, select SSH and say "YES". Make finish and exit. It's all ready, your RPI can be connected by ssh to you computer ! If you need others explanations about sets the SSH on, check this video : https://www.youtube.com/watch?v=O8AIuD_QAgE and go at 08:30.
To get connected by ssh at your RPI4 you finaly needs to use Putty. Launch Putty and enter the IP adress that you have pick up just before in the first rectangle ( without the /xx ), click on connect. And BOOM you have a first warning box who pop, you click on ok and the terminal appears. By default the username is "pi" and the password "raspberry". If you have well changed your password in raspi-config DO NOT enter "raspberry" as password but the password you have entered. BA-BOOM you are connected by SSH in the terminal of your RPI4 and you can do anything as on the RPI4 directly.
So, we wants to launch the program right ? As before, type ls and verify that you see well the Documents directory.
Then, write cd Documents/[THE NAME OF YOUR PROJECT] in the terminal and finally python3 deplacements.py. You can see the robot moove.
In this part, I'm gonna explain to you how the components works and how the code works.
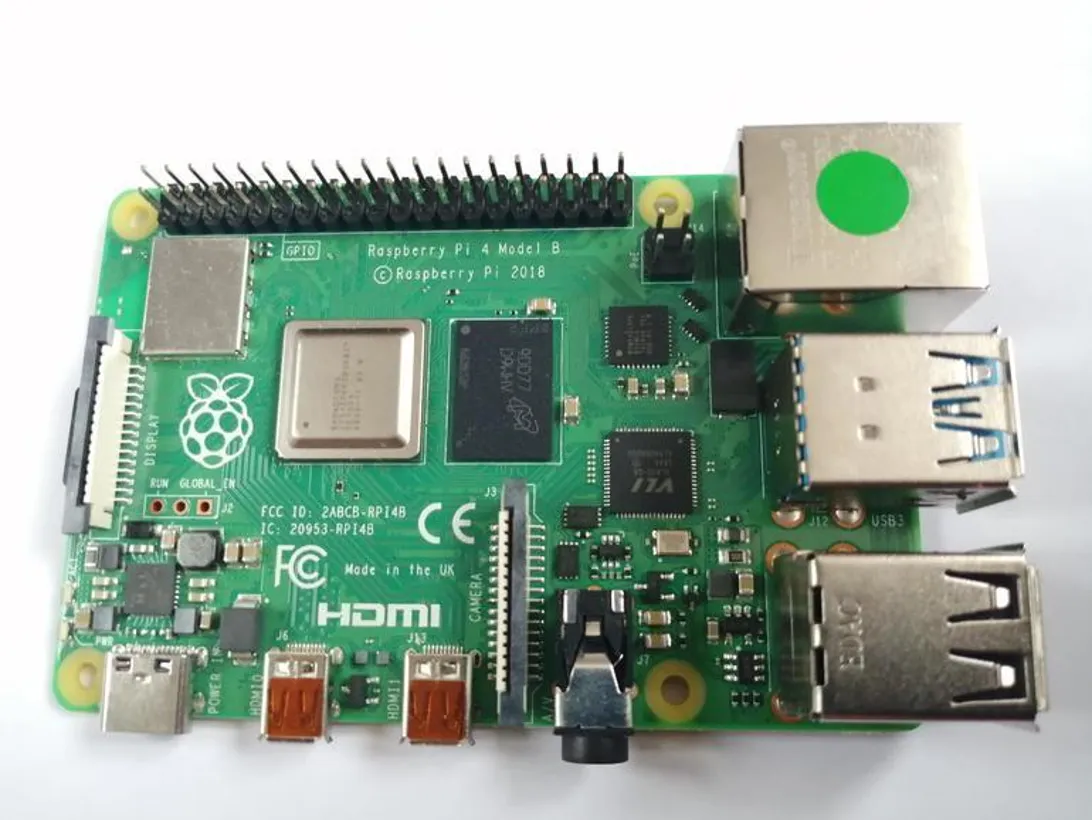
The Raspberry PI4B is a component very popular in the tech community. By its size and price, the Raspberry PI4 is very usefull for every domotics, embedded technology projects or learning. 49 x 85 mm, 35$ and that all. So little in dimensions and price. The dimensions is perfects to get mounted on a robot or set up in a ceiling, the price is perfect to do multiples project or learn the informatic without spending too much money. In effect, the RPI4 is widely used in the poorest regions to learn about computers. Check this article if you want and example : https://afriqueitnews.com/news/cameroun-une-ecole-en-zone-rurale-recoit-une-trentaine-de-raspberry-pi-pour-un-labo-informatique/. But even in affluent areas, the raspberry pi is very usefull to learn the fundementals of the informatic, check this link to get a list of ideas : https://www.blog-nouvelles-technologies.fr/70309/10-projets-raspberry-pi-pour-les-debutants/.
Good luck STI2D !