




Portable Raspberry Pi offensive toolkit with LCD control, payload launcher, WebUI, and Payload IDE.
This is a fork of the original 7h30th3r0n3/Raspyjack. Everything in this README is the upstream project except the additions below, which are unique to this fork and marked with a 🔱 wherever they appear:
- 🔱 Pi 4B Headless Install — run RaspyJack on a screenless Pi 4B, driven entirely from the WebUI over WiFi.
- 🔱 Config-driven setup — a
config/headless.jsonwizard for WiFi / hostname / Tailscale / fan. Personal settings are gitignored and never committed, so this repo clones and runs clean.- 🔱 Background fan control — temperature-based PWM fan as a systemd service (never freezes the WebUI), plus manual Fan ON / OFF / Auto payloads.
- 🔱 Clean-shutdown button — a GPIO 17 momentary-button service (hold 2s to power down safely).
- Full breakdown in docs/FORK_DIFFERENCES.md.
Keeping in sync with the original: see 🔄 Update — this fork tracks upstream and merges the creator's updates while preserving these customizations.
RaspyJack is for authorized security testing, research, and education only.
- Do not use it on networks/systems you do not own or have explicit permission to test.
- You are solely responsible for how you use this project.
- The authors/contributors are not responsible for misuse.
- LCD-driven handheld-style interface (Waveshare 1.44" or 1.3" HAT)
- Dual-display support — 128x128 (ST7735) and 240x240 (ST7789)
- 231 payloads across 13 categories
- Loot collection + browsing
- WebUI remote control dashboard
- Payload IDE (browser editor + run flow)
EXTENSIONS/work area for reusable trigger and dispatch helpers- Vendored Ragnar port with native Raspyjack launcher
- Responder / DNS spoof / ARP MITM / handshake hunter tooling integration
- WiFi utilities + attack flows (deauth, evil twin, SSID injection, beacon flood)
- Evil portal with 84 captive portal templates + credential capture
- BLE scanner, spam, beacon flood, MITM, replay, audio inject, DoS
- Reverse shell, Discord C2, HTTPS stealth shell, DuckyScript generator
- Exfiltration via HTTP, DNS, BLE, Discord, SMB, FTP, USB, Dropbox
- Dead drop WiFi file sharing with dashboard
- 25 games including Pac-Man, Tetris, Tron, LLM adventure, labyrinth
Check the WIKI for more ! https://github.com/7h30th3r0n3/Raspyjack/wiki
| Item | Description | Buy |
|---|---|---|
| Waveshare 1.44" LCD HAT (128x128) | SPI TFT ST7735 + joystick + 3 buttons |
Buy Buy |
| Waveshare 1.3" LCD HAT (240x240) | SPI TFT ST7789 + joystick + 3 buttons | Buy |
| Raspberry Pi Zero 2 WH | Quad-core 1 GHz, 512 MB RAM – super compact | Buy |
| RPI 0W + Waveshare Ethernet/USB HUB HAT | 3 USB + 1 Ethernet | Buy |
| Alternative: Dual Ethernet/USB HUB HAT | 2 USB + 2 Ethernet | Buy |
Note: Raspyjack on RPI 0w1/2 can run headless trough WebUi, but need an ethernet module at least.
| Item | Description | Buy |
|---|---|---|
| Raspberry Pi 3 Model B | Almost same specs as RPI 0w2 | Buy |
| Raspberry Pi 4 Model B (4 GB) | Quad-core 1.5 GHz, full-size HDMI, GigE LAN | Buy |
| Raspberry Pi 5 (8 GB) | Quad-core Cortex-A76 2.4 GHz, PCIe 2.0 x1 | Buy |
Note: Raspberry Pi 4/5 is not fully tested yet. It should work trough Webui but screen probably need some ajustement. Feedback is welcome.
Important: The onboard Raspberry Pi WiFi (Broadcom 43430) cannot be used for WiFi attacks.
| Dongle | Chipset | Monitor Mode |
|---|---|---|
| Alfa AWUS036ACH | Realtek RTL8812AU | ✅ Full support |
| TP-Link TL-WN722N v1 | Atheros AR9271 | ✅ Full support |
| Panda PAU09 | Realtek RTL8812AU | ✅ Full support |
- Deauth attacks on 2.4 GHz and 5 GHz networks
- Multi-target attacks with interface switching
- Automatic USB dongle detection and setup
The onboard Pi WiFi chipset is limited for monitor/injection workflows. For WiFi attack payloads, use a compatible external USB WiFi adapter.
Examples commonly used:
- Alfa AWUS036ACH (RTL8812AU)
- TP-Link TL-WN722N v1 (AR9271)
- Panda PAU09 (RTL8812AU)
From a fresh Raspberry Pi OS Lite install:
sudo apt update
sudo apt install -y git
sudo -i
git clone https://github.com/7h30th3r0n3/raspyjack.git Raspyjack
cd Raspyjack
chmod +x install_raspyjack.sh
./install_raspyjack.sh
reboot
After reboot, RaspyJack should be available on-device.
This fork adds a headless operation layer for running RaspyJack on a Raspberry Pi 4B with no screen, controlled entirely through the WebUI over WiFi.
Pi Zero + LCD HAT users: ignore this section — use the standard install above.
scripts/configure_headless.sh— interactive first-time setup wizard (WiFi, hostname, Tailscale, fan)payloads/utilities/raspyjack_headless_setup.sh— applies your config (WiFi client, hostname, services) and auto-installs the fan service when fan control is enabledpayloads/hardware/dynamic_fan_control.py— temperature-based PWM fan control via MOSFET on GPIO 18, run as a background systemd service (so it never blocks the WebUI)payloads/hardware/fan_on.py/fan_off.py/fan_auto.py— manual fan override (force 100%, force off, or return to automatic)scripts/shutdown_button.py— GPIO 17 power button, hold 2s to shut down cleanly (polls the pin — reliable on current Raspberry Pi OS)config/systemd/— systemd units for the fan service, shutdown button, and headless autostartdocs/— Pi 4B user guide, field guide, setup docs
See docs/FORK_DIFFERENCES.md for full details.
- Raspberry Pi 4B (any RAM)
- MicroSD card (16GB+), flashed with Raspberry Pi OS Lite (64-bit, Bookworm)
- Power source (battery bank or wall)
- Optional: fan + IRLZ44N MOSFET wired to GPIO 18 for cooling
- Optional: momentary button wired between GPIO 17 and GND for clean shutdown
Step 1 — Clone this fork and run the main installer
sudo apt update && sudo apt install -y git
sudo -i
git clone https://github.com/GG-93/RaspyJACKED.git Raspyjack
cd Raspyjack
chmod +x install_raspyjack.sh
./install_raspyjack.sh
reboot
Step 2 — First-time headless config wizard
Run this once after rebooting. Creates config/headless.json with your personal settings (WiFi credentials, hostname, optional Tailscale, optional fan control). This file is gitignored and never committed.
sudo bash /root/Raspyjack/scripts/configure_headless.shStep 3 — Apply headless config
⚠️ Run this over Ethernet or USB the first time, not over WiFi. The script briefly drops and reconnects the WiFi profile (~5 seconds). It will reconnect automatically, but Ethernet is safer for the first run.This does not touch your SSH password or any other credentials set during imaging.
sudo bash /root/Raspyjack/payloads/utilities/raspyjack_headless_setup.shTo make this run automatically on every boot:
sudo bash /root/Raspyjack/payloads/utilities/raspyjack_headless_setup.sh install-serviceStep 4 — Access RaspyJack
The WebUI listens on every interface (port 8080) and renders the full RaspyJack
display in your browser with clickable buttons — you drive everything from the browser,
no screen needed. How you reach it depends on how the Pi is connected:
| Connection | How to reach the WebUI |
|---|---|
| Phone hotspot (Android/GrapheneOS) | raspyjack.local usually does not work (phones block the multicast mDNS needs) and the IP changes each session. Open your phone's Hotspot → Connected devices list, find the Pi's IP, then browse http://<that-ip>:8080. |
| Laptop hotspot or home router | http://raspyjack.local:8080 works here (mDNS passes), or use the IP. |
| Direct Ethernet cable (Pi ↔ your computer) | The Pi hands your computer an IP automatically — http://192.168.100.1:8080 or ssh <user>@192.168.100.1. |
| Pi cabled into a router | It pulls a normal DHCP address (and gets internet) — reach it at that IP. |
Static IP note: iPhone hotspots use a fixed subnet (
172.20.10.x) so a static IP is reliable there; Android/GrapheneOS randomize the subnet every session, so don't rely on a static — use the connected-devices lookup above. By default the Pi uses DHCP so it always joins whatever subnet your hotspot hands out.
Step 5 — Optional: external USB WiFi adapter (for attacks/monitor mode)
The onboard WiFi is your management/WebUI link. For monitor-mode and attack payloads, plug in
a USB WiFi dongle and install its driver from the WebUI: run the WiFi Adapter Installer
payload (payloads/utilities/wifi_dongle_installer.py) — it detects the chipset and installs
the right driver automatically (needs internet: plug the Pi into a router for that step).
Step 6 — Optional: fan control and shutdown button
Fan — if you set fan_control.enabled in the wizard (Step 2), the headless setup
(Step 3) installs and starts the fan as a background systemd service automatically —
nothing else to do. It runs on every boot and stays out of the WebUI's way. To control it
by hand, use the Fan ON / Fan OFF / Fan Auto payloads in the WebUI hardware category.
Do not launch
Dynamic Fan Controldirectly as a foreground payload — it's a forever-running loop, so it now detects that case and hands off to the service instead of blocking the WebUI. Wire the fan with an IRLZ44N MOSFET on GPIO 18 (gate→18, drain→fan−, source→GND, fan+→5V).
Shutdown button — wire a momentary button between GPIO 17 (pin 11) and GND (pin 9), then install its service:
sudo cp /root/Raspyjack/config/systemd/raspyjack-shutdown.service /etc/systemd/system/
sudo systemctl daemon-reload
sudo systemctl enable --now raspyjack-shutdown.service
Hold the button ~2 seconds to trigger a clean shutdown.
| Doc | Purpose |
|---|---|
docs/FIELD_GUIDE.md |
Quick day-to-day reference |
docs/RASPYJACK_USER_GUIDE.md |
Full Pi 4B headless guide |
docs/PORTABLE_HEADLESS_SETUP.md |
Connection methods (WiFi client, USB direct, Tailscale) |
docs/FORK_DIFFERENCES.md |
What this fork adds vs upstream |
sudo -i
cd /root/Raspyjack
git pull origin main
reboot
Your
config/headless.json, loot, and captures are gitignored, so a pull won't touch them.
This fork tracks the upstream project and merges the creator's updates while keeping the fork's customizations. One-time remote setup (already configured in this repo):
git remote add upstream https://github.com/7h30th3r0n3/Raspyjack.git # if not already presentThen, whenever you want to catch up with the creator:
git fetch upstream            # get the creator's latest
git merge upstream/main       # merge their updates into your branch (your commits are preserved)
# resolve any conflicts, then:
git push origin main          # save the synced result to your fork
A conflict only happens where the same lines changed on both sides; edit the marked file,
git add it, and git commit. git merge --abort safely undoes an in-progress merge.
⚠️ Do notrm -rfand re-clone from upstream — that would erase this fork's headless layer, fan/button services, and docs. Always sync withgit merge upstream/maininstead.
Before major updates, back up any loot/config you care about.
RaspyJack includes a browser UI and IDE in web/.
- WebUI docs:
web/README.md - Main WebUI:
https://<device-ip>/(or fallbackhttp://<device-ip>:8080) - Payload IDE:
https://<device-ip>/ide(orhttp://<device-ip>:8080/ide)
./scripts/check_webui_js.shThis validates syntax for:
web/shared.jsweb/app.jsweb/ide.js
Raspyjack now includes a vendored port of
PierreGode/Ragnar.
- Launch it from
Payload -> Utilities -> Ragnar - Ragnar runs as a separate headless stack on
http://<device-ip>:8091 - The Raspyjack payload now acts as an on-device controller: status, readable URL, automation/manual toggles, network scan trigger, vulnerability scan trigger, and log view
- The upstream source lives in
vendor/ragnar/ - If the launcher reports missing Python packages, install the optional bridge deps with:
./scripts/install_ragnar_port.sh| Control | Action |
|---|---|
| UP / DOWN | Navigate |
| LEFT | Back |
| RIGHT / OK | Enter / Select |
| KEY1 | Context/extra action (varies) |
| KEY2 | Secondary action (varies) |
| KEY3 | Exit / Cancel |
RaspyJack supports two LCD screens from the same codebase. The installer asks which screen you have.
| Display | Chip | Resolution | Config value |
|---|---|---|---|
| 1.44" (original) | ST7735S | 128x128 | ST7735_128 |
| 1.3" | ST7789 | 240x240 | ST7789_240 |
To switch screens, change "type" in gui_conf.json and reboot:
"DISPLAY": { "type": "ST7789_240" }- Copy
payloads/examples/_payload_template.pyinto the appropriate category folder - Use
ScaledDrawandscaled_font()so it works on both screens - Keep
KEY3as exit button - Add an icon in
menu_icons.json
#!/usr/bin/env python3
import os, sys, time
sys.path.append(os.path.abspath(os.path.join(__file__, '..', '..', '..')))

import RPi.GPIO as GPIO
import LCD_1in44, LCD_Config
from PIL import Image, ImageDraw, ImageFont
from payloads._display_helper import ScaledDraw, scaled_font
from payloads._input_helper import get_button

PINS = {"UP": 6, "DOWN": 19, "LEFT": 5, "RIGHT": 26,
        "OK": 13, "KEY1": 21, "KEY2": 20, "KEY3": 16}
GPIO.setmode(GPIO.BCM)
for pin in PINS.values():
    GPIO.setup(pin, GPIO.IN, pull_up_down=GPIO.PUD_UP)

LCD = LCD_1in44.LCD()
LCD.LCD_Init(LCD_1in44.SCAN_DIR_DFT)
WIDTH, HEIGHT = LCD.width, LCD.height
font = scaled_font()

try:
    while True:
        btn = get_button(PINS, GPIO)
        if btn == "KEY3":
            break
        img = Image.new("RGB", (WIDTH, HEIGHT), "black")
        d = ScaledDraw(img)
        d.text((6, 6), "Hello Payload", font=font, fill="#00FF00")
        LCD.LCD_ShowImage(img, 0, 0)
        time.sleep(0.05)
finally:
    LCD.LCD_Clear()
GPIO.cleanup()Payloads can also import shared helpers from EXTENSIONS.api when they need a reusable gate or action.
from EXTENSIONS.api import WAIT_FOR_PRESENT, REQUIRE_CAPABILITY

try:
    REQUIRE_CAPABILITY("binary", "bluetoothctl")
    WAIT_FOR_PRESENT(name="TestRJ", timeout_seconds=30)
    while True:
        btn = get_button(PINS, GPIO)
        if btn == "KEY3":
            break
finally:
    LCD.LCD_Clear()
    GPIO.cleanup()
These helpers do not change the display model. If a payload draws to the LCD, it should still use ScaledDraw and scaled_font() so the same code works on both supported screens.
Edit menu_icons.json and add your payload name in the payloads section:
"payloads": {
    " my_payload": "\uf002",
}
Icons are FontAwesome 6 Solid. Browse available icons at https://fontawesome.com/v6/search?o=r&s=solid
- UI/tool payloads: Use
ScaledDrawwith 128-base coordinates (0-127). Never useWIDTH/HEIGHTin draw calls. - Game payloads: Render at 128x128 with regular
ImageDraw.Draw, then resize to(WIDTH, HEIGHT)before showing.
Raspyjack/
├── raspyjack.py          # Main UI engine
├── gui_conf.json          # Display type, colors, pins, lock
├── menu_icons.json        # FontAwesome icons for menus
├── LCD_1in44.py           # LCD driver (ST7735 + ST7789)
├── LCD_Config.py          # SPI/GPIO config
├── web_server.py          # WebUI HTTP server
├── device_server.py       # WebSocket device server
├── rj_input.py            # Input handler
├── install_raspyjack.sh   # Installer
├── web/                   # WebUI frontend
├── payloads/
│   ├── _display_helper.py # ScaledDraw + scaled_font
│   ├── _input_helper.py   # GPIO + WebUI input
│   ├── reconnaissance/    # Nmap, Shodan, OSINT, AP/client stats, flock detection, Norse recon suite, pwnagotchi
│   ├── wifi/              # Deauth, evil twin, CIW Zeroclick (SSID injection), beacon flood, BLE spam, pwnagotchi
│   ├── network/           # ARP MITM, DNS spoof, handshake hunter with auto-upload, WPA cracking
│   ├── credentials/       # Responder, credential capture, hash harvesting
│   ├── bluetooth/         # Scanner, spam, beacon flood, MITM, replay, audio inject, DoS
│   ├── usb/               # DuckyScript generator, USB attacks
│   ├── exfiltration/      # HTTP, DNS, BLE, Discord, SMB, FTP, USB, Dropbox
│   ├── evasion/           # Evasion techniques
│   ├── remote_access/     # Reverse shell, Discord C2, HTTPS stealth shell
│   ├── evil_portal/       # Captive portal with 84 templates, whitelist, SSID editor, credential capture
│   ├── dead_drop/         # WiFi file sharing with dashboard
│   ├── utilities/         # Weather, IRC, morse, translator, video player, interface manager, system monitor
│   ├── hardware/          # Hardware interaction payloads
│   ├── games/             # 25 games including Pac-Man, Tetris, Tron, LLM adventure, labyrinth
│   └── examples/          # Payload templates
├── loot/                  # Captured data
├── config/                # Payload configs
├── DNSSpoof/
├── Responder/
└── wifi/                  # WiFi manager
PRs are welcome.
If you submit UI changes, please include:
- short description + screenshots/gifs,
- any changed routes/workflows,
- output of
./scripts/check_webui_js.sh.
Videos made by the community about RaspyJack (Thanks to all of you💕):
RaspyJack Makes the Cardputer Zero INSANE! Flipper One is left in the DUST
Talking Sasquatch

RASPYJACK - A Network Swiss Army Toolkit Based on the Raspberry Pi 2W
Zeek

Raspyjack - Small Offensive Network Toolkit for Raspberry Pi
HackedExistence

Raspyjack DIY Pentesting - Full Guide
Valleytech Custom Solutions
Linux in your palm / CardputerZero prototype sneak peek
Sn0ren
Meet The RaspyJack, WiFi 5 GHz And Ethernet!
Adventures of Illya
How to Auto Update Your RaspyJack + 135 Brand New Payloads
UAgain Shadow

Raspyjack WebUI Payload Upload SUPER EASY
UAgain Shadow
RaspyJack Just Got a MASSIVE Update... 135 NEW Payloads?!
UAgain Shadow

How to Build a RaspyJack - Complete Guide Pi Zero 2W Setup
UAgain Shadow

The M5Stack Cardputer Zero is INSANE For Pentesting
Valleytech Custom Solutions

This $22 Adapter Unlocks Hidden Potential in Your RaspyJack
Anubis Darkwatch (The Anubis Project)
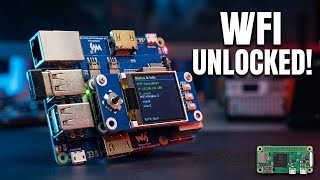
RaspyJack - A Full Featured Network Testing Multi-tool
Anubis Darkwatch (The Anubis Project)
RaspyJack project - Watch as I build!
Hackazillarex

RaspyJack offensive tool kit. - m0usem0use
Best Linux Pentesting Tool 2026 - Valleytech Custom Solutions
Raspyjack Pentest Tool - Valleytech Custom Solutions
Raspyjack Wardriving - Valleytech Custom Solutions
Wardriving 2 - Full Build Vid Available Now - Valleytech Custom Solutions
My Raspyjack Build - Valleytech Custom Solutions
RaspyJack X305 & X306 - Valleytech Custom Solutions
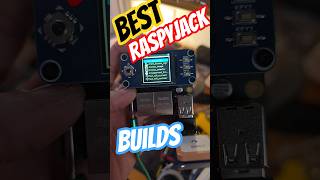
RaspyJack Cardputer Zero - Valleytech Custom Solutions

M5stack Cardputer Zero - Valleytech Custom Solutions

Raspy Jack Is Flashed - WebUI feature! - Valleytech Custom Solutions
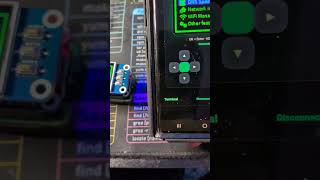
Major Raspyjack Update - Valleytech Custom Solutions

How to Auto Update Your RaspyJack + 135 Payloads - UAgain Shadow

RaspyJack CCTV Viewer - Valleytech Custom Solutions

RaspyJack MAJOR Update! - Valleytech Custom Solutions
📹 Made a video about RaspyJack? Open an issue or PR to get featured here!