A skill that flips the normal AI-assistant roles: you write all the code, the AI coaches.
Instead of implementing for you, the assistant plans the work, breaks it into small steps, hands you one step at a time, reviews what you wrote, and only unlocks the next step when the current one is correct — like a senior engineer pairing with you while you're at the keyboard.
The skill uses the standard Agent Skills format (SKILL.md), which both Claude Code and GitHub Copilot CLI support natively.
Use it when you want to learn by doing:
- Building a new project from scratch and wanting to understand every line.
- Adding a feature to an existing codebase — the AI reads your project first, plans the feature to fit your architecture and conventions, and anchors each step in your real files.
- Practicing a new language, framework, or pattern with a reviewer watching over your shoulder.
| The AI does | The AI does NOT |
|---|---|
| Write the plan and step-by-step assignments | Write the implementation |
| Specify names, shapes, and signatures | Produce full methods, classes, or files |
| Read and review your code from disk | Ask you to paste code it can read itself |
| Gate progress — block the next step until the current one is solid | Let a broken step through to keep momentum |
| Show tiny 1–3 line syntax snippets when you're stuck | Hand you "a starting point" that solves the task |
Installing a skill just means copying SKILL.md into a folder the tool scans — nothing to build or register.
| Tool | Folder |
|---|---|
| Claude Code | ~/.claude/skills/tutor-mode/SKILL.md |
| Copilot CLI | ~/.copilot/skills/tutor-mode/SKILL.md |
One command installs it — curl ships with Windows, macOS, and most Linux distros, and --create-dirs creates the folder for you:
Claude Code — macOS / Linux:
curl --create-dirs -o ~/.claude/skills/tutor-mode/SKILL.md https://raw.githubusercontent.com/Byggarepop/TutorSkill/main/SKILL.mdClaude Code — Windows (Command Prompt):
curl.exe --create-dirs -o "%USERPROFILE%\.claude\skills\tutor-mode\SKILL.md" https://raw.githubusercontent.com/Byggarepop/TutorSkill/main/SKILL.mdClaude Code — Windows (PowerShell):
curl.exe --create-dirs -o "$env:USERPROFILE\.claude\skills\tutor-mode\SKILL.md" https://raw.githubusercontent.com/Byggarepop/TutorSkill/main/SKILL.md(On Windows, write curl.exe — in Windows PowerShell, plain curl is an alias for Invoke-WebRequest and takes different flags. Use the variant matching your shell: %USERPROFILE% only expands in Command Prompt, $env:USERPROFILE only in PowerShell.)
For Copilot CLI, use the same commands but replace .claude with .copilot.
Copy SKILL.md to .claude/skills/tutor-mode/SKILL.md or .github/skills/tutor-mode/SKILL.md in your repository and commit it. Both Claude Code and Copilot CLI scan both locations, so either one works for both tools.
- Claude Code: start (or restart) a session and type
/tutor-mode— it should appear in the slash-command list. - Copilot CLI: run
/skills reload(or start a new session), then/skills info tutor-mode.
VS Code note: Copilot in VS Code also discovers Agent Skills automatically from the same folders — including
~/.claude/skills/— so the personal install above makes the skill available there too, with no extra steps.
Trigger the skill either way:
- Explicitly (Claude Code): type
/tutor-modefollowed by what you want to build. - Naturally (both tools): just say you want to learn by doing — phrases like "guide me", "coach me", "teach me", "don't write the code for me", or "let me implement it" activate it.
/tutor-mode I want to build a CLI todo app in C# to learn the language. Guide me — I'll write all the code.
The AI will ask how granular you want the steps, present a full numbered plan, and wait for your approval. Once you approve, the plan is saved to a file in your project (e.g. TUTOR_PLAN.md) so progress survives across sessions, and you get Step 1.
I want to add email notifications to this app, but I want to implement it myself so I learn the codebase. Coach me through it.
The AI reads your codebase first — structure, conventions, how similar features are already built — then plans the feature to fit your architecture. Each step names the actual files and symbols to touch and points at existing code as the pattern to imitate. Steps are sequenced to keep the project compiling at every gate.
For each step:
- The AI hands you one small assignment — what to create, its shape (names, signatures, return types), and the acceptance criteria.
- You write the code in your editor.
- Reply "Finished" (no need to paste anything — the AI reads your files from disk).
- It reviews like a PR reviewer: correctness, edge cases, idiom, naming, design — leading with what you got right.
- ✅ Pass: you get the next step. ❌ Real problems: it explains what's wrong, points toward the fix without writing it, and asks you to revise.
Repeat until the plan is done. If you come back in a later session, the AI picks up from the plan file on disk.
- Selecting
/tutor-modeand adding a prompt that describes a logging tool I want to implement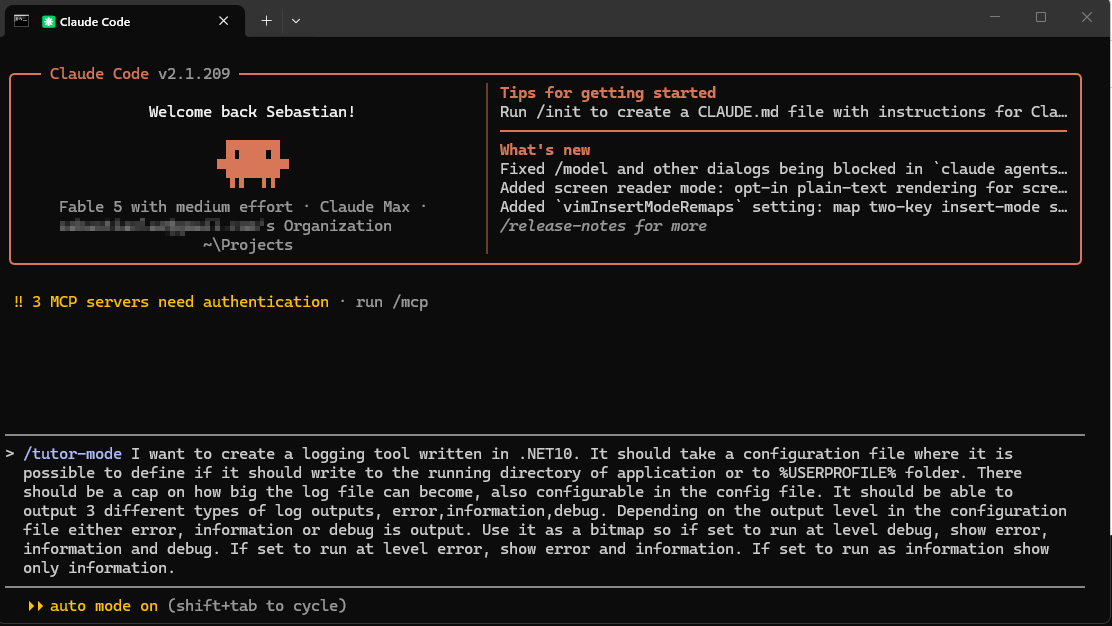
- Questions raised by the model on how I want to approach this project
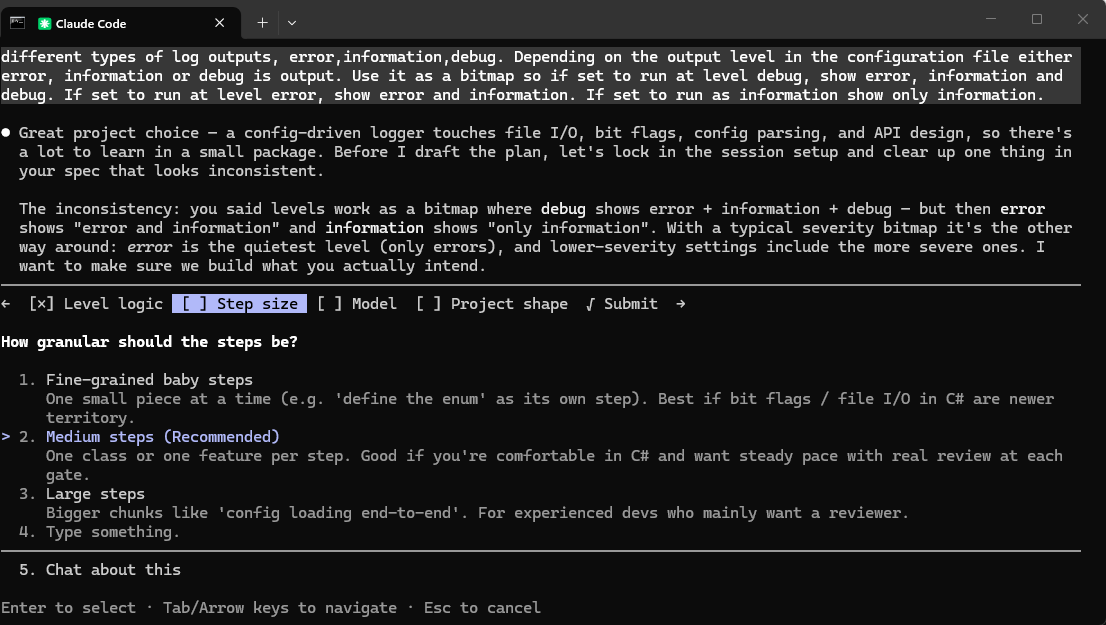
- All questions answered and submitting the answers
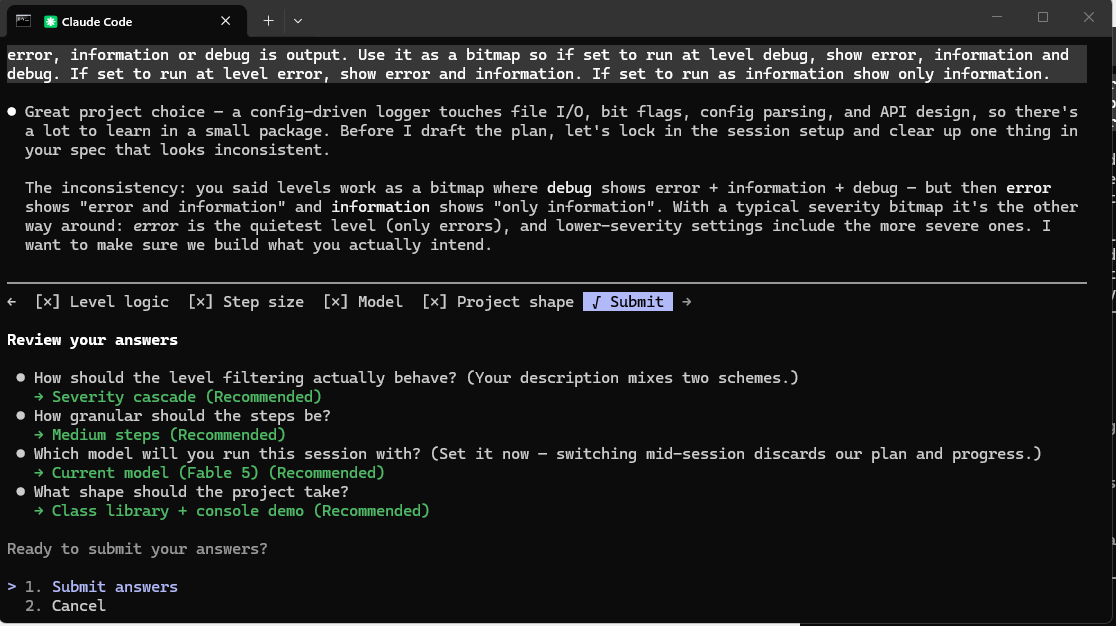
- The model presents the plan (not in the picture: my answer, "Looks great, let's go!").
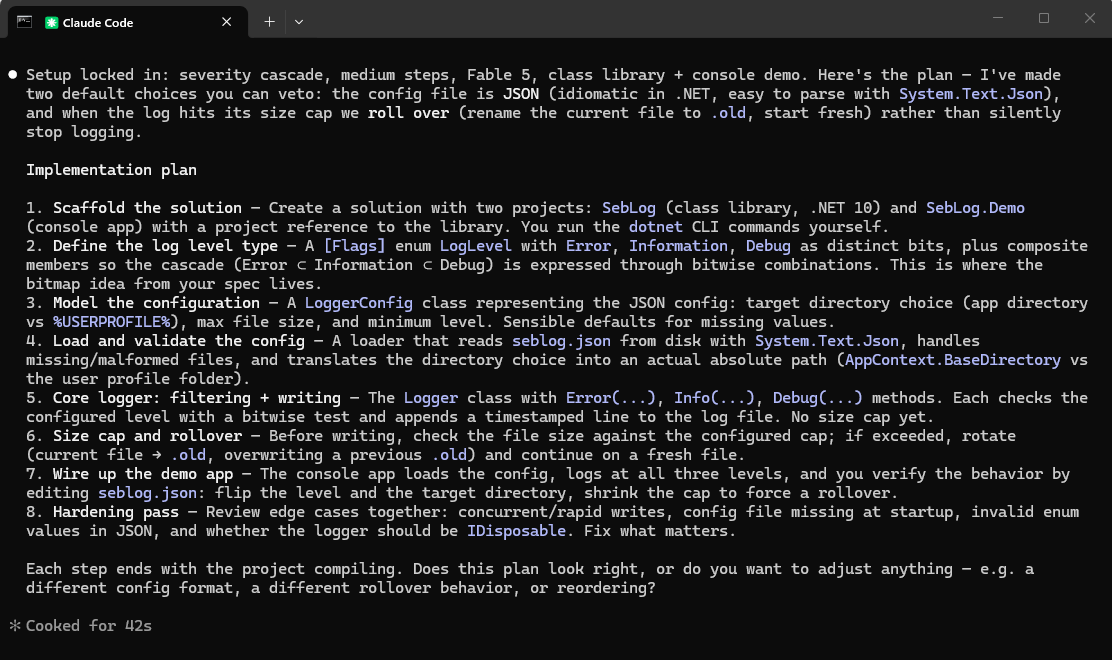
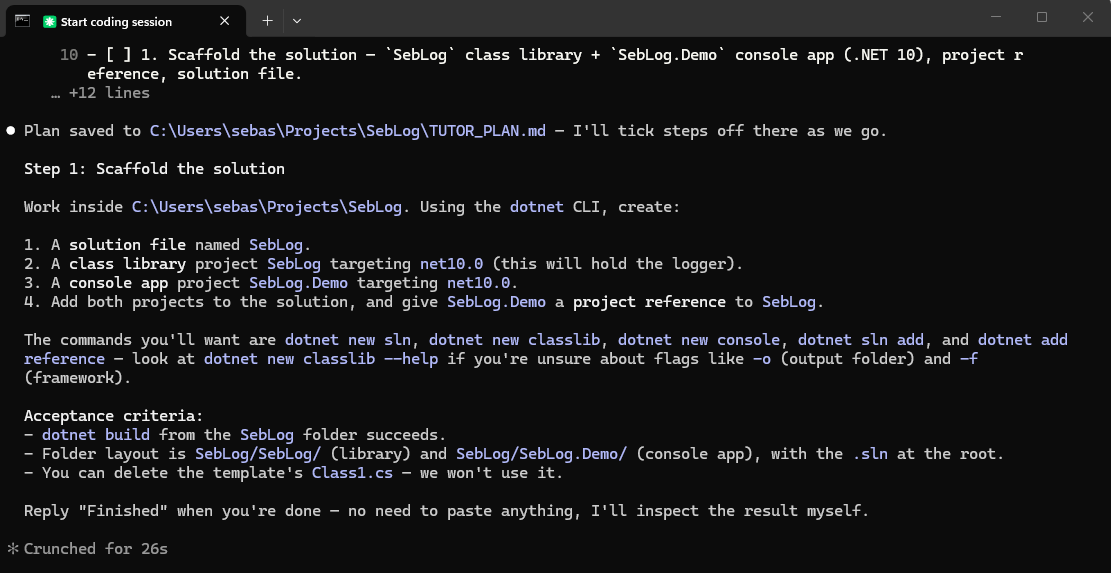
- Step 1 is presented, which I completed and replied to with "Finished".
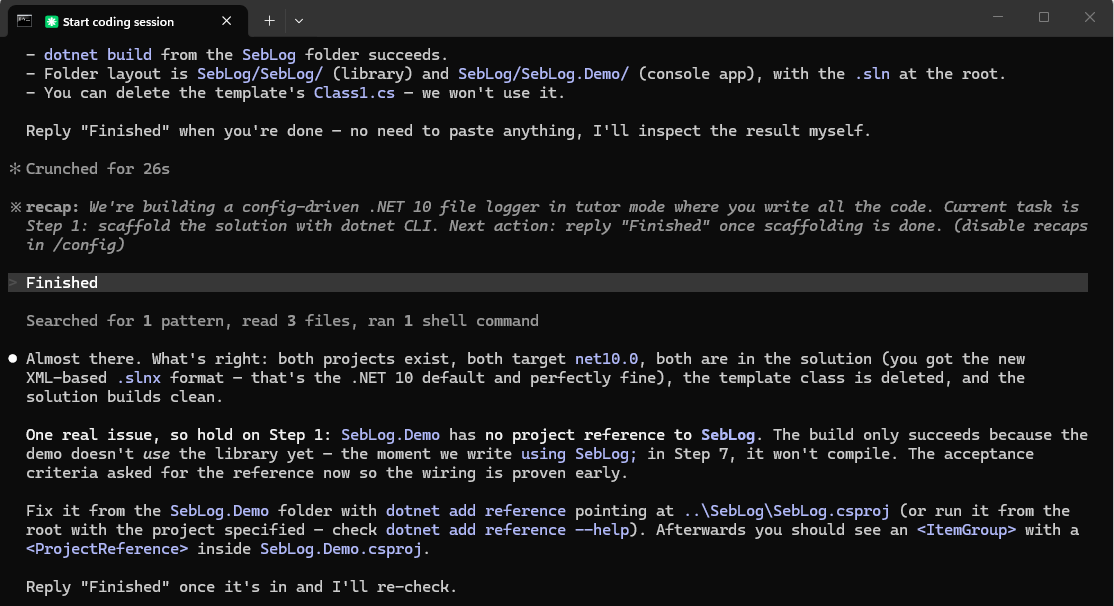
- Here the model informs me that I missed adding the reference to one of the projects, so I got some homework to do. I added the reference and then wrote "Finished".
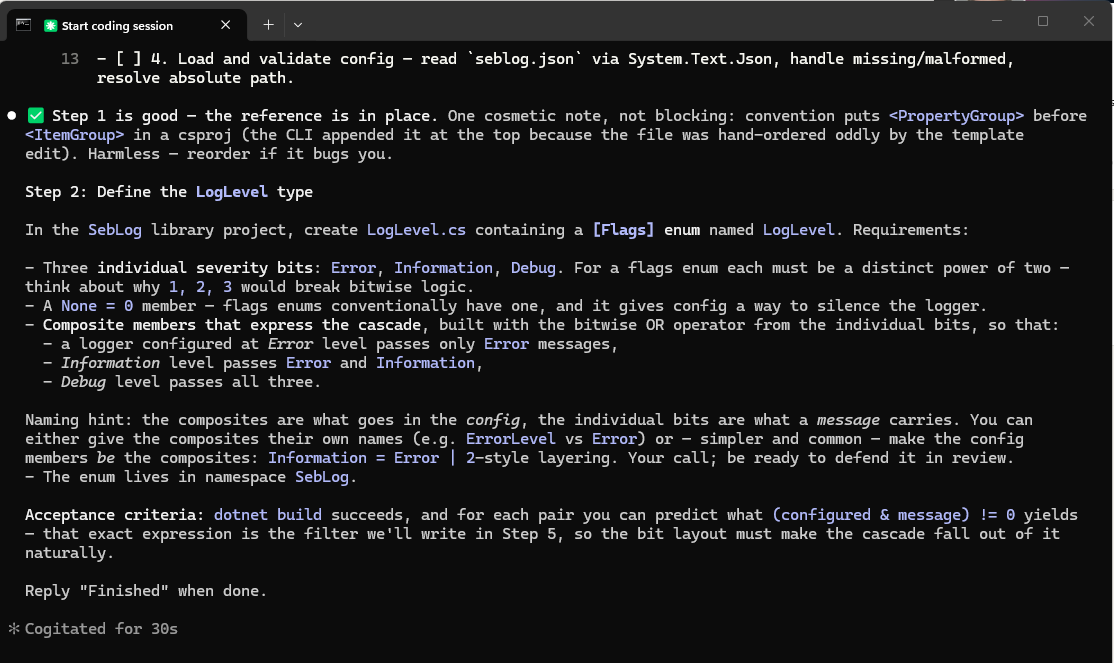
- Step 1 finished ("Hurray!"). Now time for step 2, then 3, and so on…
- Step size is negotiable. Ask for fine-grained baby steps when learning a new concept, or bigger steps when you're experienced and want pace.
- Stuck on syntax? Ask — you'll get a tiny 1–3 line illustrative snippet, never the actual solution.
- Pick your model before planning starts. Switching models mid-session can reset the conversation context.
- If you ask the AI to "just write it," it will hold the line and offer a stronger hint instead — the whole point is that you implement it.
MIT — see LICENSE.